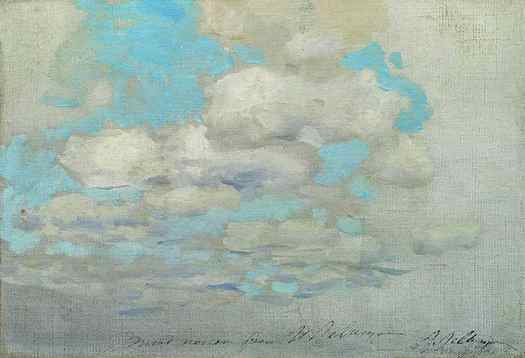
Your goal is to see clouds as basic shapes and forms just as you would a tree, rock, or person. Steve Huston calls this “box logic”. What would the clouds look like if you could only see cubes, spheres, cylinders, and cones?
How To Paint Clouds With Acrylic Paint the Easy Way!
In this tutorial, I will show you how to paint clouds a fun and easy way- without a single paintbrush! This fool-proof technique uses q-tips/cotton swabs and is relaxing to paint. You’ll learn this technique in the step-by-step tutorial below or a full length YouTube tutorial.
If you’ve done any of my other painting tutorials, you’ll know my style is to make paintings easy for all skill levels but also enjoyable and relaxing to create.
In my opinion, the end or final painting doesn’t matter so much as the process does. When the process is stress-free and enjoyable that’s when you get the therapeutic effects from painting and your creativity and confidence are elevated as a result.
I had lots of fun making this cloud painting tutorial, hope you enjoy painting it too!
If you’re looking for more aesthetic sunset paintings, check out this how to paint mountains in a pink sunset, and this gorgeous sunset cityscape painting tutorial.
Or if you’re wanting to add a more realistic looking moon to this painting, check out this how to paint a realistic moon tutorial.
Now let’s get ready to paint some clouds!
How to Paint Clouds Without a Paintbrush
Surprisingly, painting clouds can be done with a couple different ways, both without using a painbrush.
Some artists like to dab on paint with an artist sponge, like these ones, which gives soft fluffy edges to clouds.
My technique uses another tool, a tool you probably already have at home right now!
Q-tips. or cotton swabs, depending on where you live.
Yep, those nifty ear cleaning tools, can be doubled as a fun painting tool!
I’m a bit painting/q-tip obsessed- You’ll see why after checking out my other tutorials like, How to Paint Lavender, and my super popular Cherry Blossom Tree Painting tutorial.

Using Q-tips to Paint
Since we will be painting mainly big and fluffy cumulus clouds (which remind me of giant pieces floating cotton), its best to group your q-tips together as your paint.
To do this, I used 4-5 Q-tips and attached them together with a rubber band

I used these grouped q-tips for the larger clouds in the painting. It allowed me to form the clouds faster.
For the smaller clouds in the painting I opted to use a single q-tip so I could get more control over the shape and shadows of the cloud.
How To Create Authentic Clouds Shapes
One of my art teachers gave me advice that I still use until this day. The advice was to take your subject matter and break it down into simple shapes like circles, ovals, squares, triangles, rectangles, etc. Before starting any painting, this was an exercise all the students used to do.
Once you start seeing the object in terms of simple shapes, it becomes so much easier to paint/draw/sketch any object in a very authentic way.
It’s a simple and nifty trick that you can use too!
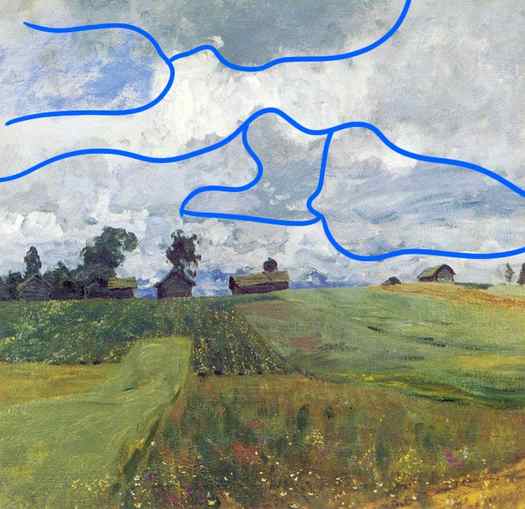
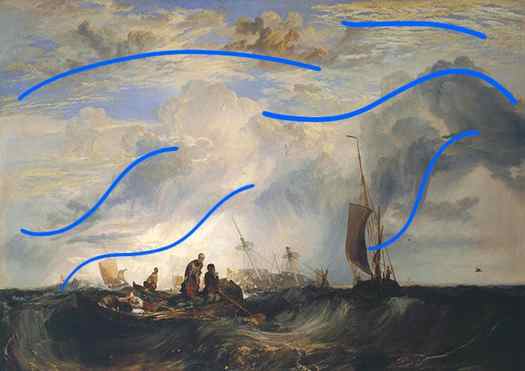
Clouds are a perfect example of how you can start looking at objects in terms of simple shapes. And you’ve probably already done it as a child! Do you remember looking up at the sky and imagining clouds to looking like a cat, a dog, or a funky frog?
For the clouds in the painting below, I saw a “triangle” shape in them. I’ve added plenty of pictures in the tutorial below so you can see the exact triangular shape I used so you can easily recreate it too.


Alternatively, you can have even more fun and explore more clouds shapes on your own with the fun activity below.
Fun Cloud Shape Activity
On a nice cloudy day, go outside with a piece of paper and a pencil and look at the clouds (make sure you have 10-15 minutes of uninterrupted time).

Look at all the clouds for a couple of minutes, and take note of 1 or 2 that catch your eye. Focusing on the 1-2 you picked, try to break the cloud shape into simple shapes (triangles, squares, ovals, circles, etc) and sketch it out on your paper. The shapes can overlap and can be as big/small as you like.
Use the 1-2 clouds you sketched out with your simple shapes activity and add them to the cloud painting tutorial below.
Comment below which shapes YOU found!
What Colors Do You Need to Paint Clouds?
I used white acrylic paint as the base color for all my clouds. Clouds also have shadows in them, this gives them dimension and depth.
For the shadows portion, I used a lovely and soft lavender color. I simply mixed a tiny bit of my Liquitex violet prism into white paint. I dabbled some of this lavender color into my cloud shapes while all paint layers are still wet so that the white of the clouds and shadow blend nicely.
I then went over the shadows with more white (on my q-tips) to soften the edges even more. This layering approach is super important in painting and really adds beautiful depth into it.
It is also important to paint each cloud while it’s still wet. This ensures that each layer you add to it blends nicely together.
TIP: paint each cloud fully, then move on to the next cloud
Note on colors: If you don’t want to buy the same tones of purple/pink’s I used in this tutorial you can just use any pink and purple you have at home.
Clouds An A Sunset Background
For the background of this cloud painting, I was really feeling a dark rich purple and bright pink to mimic an aesthetic sunset sky look.
I encourage you to think of what color choices inspire you for your background. It’s totally fine to follow tutorials to the tee, but it’s even more satisfying to put your own style and flair to it.
Experimenting with color is fun, I hope you’ll give it a try! Your painting will be that much more unique and more YOU!
If you have any questions or need help with colors, don’t hesitate to send me an email or comment below.
How to Paint Clouds On YouTube
If you’re a visual learning and prefer video instructions, feel free to watch the full YouTube tutorial below. If you want detailed step by step written instructions (with pictures) they are below the video.

Yield: 1
How To Paint Clouds

Learn how to paint clouds with acrylic paints- the super-easy way!
Active Time 1 hour 30 minutes
Total Time 1 hour 30 minutes
Difficulty Beginner
Estimated Cost $10
Materials
- prism violet acrylic paint (or any deep purple)
- medium magenta acrylic paint (or any pink)
- fluorescent pink paint (optional)
- white paint
- canvas
- Q-tips
- liner brush
- 1 inch (or medium size) flat brush
- pallet
- jar of water
- Click here for the full length YouTube tutorial
- Using your medium flat brush, paint on your deep purple color onto the top 1/5th of your canvas


- Without cleaning your brush add a dab of white onto it and paint this color below the purple until midway on the canvas (it will be a lighter purple)

- Without cleaning your brush off, add some pink onto your brush. The pink I used in this painting is a 70/30 mix of medium magenta to fluorescent pink. But you can use any pink you have laying around. Paint this color onto canvas below the light purple
- Without cleaning off your brush add some white to the paintbrush and paint the rest of the canvas to the bottom. Your sky background is now done. Wait until it fully dries before moving onto the next steps

- Take a single Q-tip and load some pure white paint onto it. Form some triangles shapes on your canvas, like the picture below.


- Take your group of 4-5 Q-Tips, load some white paint on them, and fill in your triangle shapes/clouds. Don’t be afraid to paint outside your triangle shape. Clouds are not angular, but rather have soft edges. Have fun and soften out your triangle with dabs of paint above, below, and to the sides. Use your intuition and just go with it- this part was my most favorite- painting outside the lines!
- While the cloud paint is still wet, take some white paint and mix in a tiny amount of purple to make a lavender color. Using your q-tips, add some lavender shadows to your clouds. Ensure the bottom of your cloud has the lavender paint across it, then add the lavender paint as you wish. I added it in triangular shapes to show shadows of multiple clouds in one formation.

- While the shadow cloud paint is still wet, reload your 4-5 q-tip bundle with more pure white paint and go over the cloud to soften the lavender shadow edges.

- As a finishing touch to the cloud, mix some white with a tiny amount of your pink paint and put a couple of dabs of it here and there on your clouds. I added just a tiny hint of it so its very subtle. This is the color of the pink sky reflecting subtly in the clouds.
- Repeat step 5-9 with the remainder of your clouds. I’m including the pictures of each of my initial cloud shapes to help you recreate clouds in this painting.


- Your clouds are now done! Time for some finishing details. Using a liner brush and some pure white paint, dot on some stars all over your sky, but concentrating most of them in the purple portion of your sky. Using the same liner brush, paint in a moon, and you’re done!
Thick, Loosely Formed Clouds

These cumulus clouds are dense and oh-so-fun to paint when trying to capture an overcast day. You only need a few patches of blue sky to poke through!
1. Sketch
Start by sketching a few jagged shapes. These will be patches of sky peeking out from behind the cloud. Keep these pencil lines very light, so they vanish in the paint or can be gently erased later.
2. Add Water and Paint
Apply a water glaze across the entire sky. Then drop in blue paint within your pencil sketches. The color will flow beyond the pencil lines and crease light wisps of blue.
3. Add Darker Blues
Let the painting dry about halfway before dabbing more blue into these same areas. Don’t worry about making this super even — you want the color to be natural. Use different water-to-paint ratios to get darker and lighter areas of blues, and remember there are no set rules here — just keep adding more color until you’re satisfied with the painting. (Bonus: if you add too much blue, it’s easy to lift off the color.)
Big, Billowy Clouds

You know those lazy summer days, when you look for shapes in puffy clouds as they mosey across the sky? That’s what we’re talking about here, and these classic clouds are super simple to paint.
1. Sketch
Keeping your pencil lines super light, start by sketching out your cloud in a basic oval or circle shape. Build in more detailed edges, then draw light lines within the cloud to indicate the billowy hills.
2. Paint the Sky
Lay a water glaze around the cloud, keeping the cloud itself completely dry. Paint the sky your desired shade of blue. Let dry.
Pro Tip: When you drop in the color, it’ll spread to the wet areas, so it’s vital that the cloud stays dry. You can apply masking fluid to the paper before you begin painting, which will prevent the areas you want to keep white from being accidentally covered in paint.
3. Add the Details
Once the painting is completely dry, it’s time to work on the cloud. Give it depth by adding a light gray wash to define the billows (see arrow 1 in the image above).
To round it out, wet an area just outside of the hills and drop in a small amount of gray. Immediately smooth the edges with your brush (see arrow 2 in the image). That’s it!
Dramatic Cumulus Clouds

These clouds are perfect for those dramatic, sweeping landscapes you see right before a storm rolls in. The key to painting stormy skies is to layer dense, dark areas with bright, white ones.
1. Sketch
Draw the basic cloud shape, just like you did with the big, billowy cloud. But this time, really stack it — lightly outline lots of hill-like formations around and inside the cloud.
2. Water Glaze
Add a water glaze to your entire sky area. But unlike the billowy cloud, allow some of the water to flow inside the cloud.
Add the blue paint. The water inside the clouds will pump up the drama of your painting (see the arrows in the photo above). Keep it loose and see what happens — remember, you can always lift any color you don’t want.
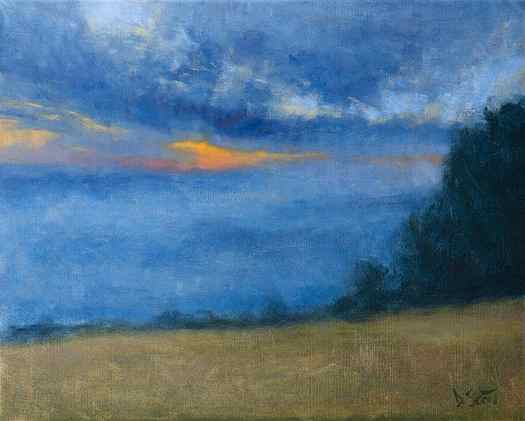
Cloud Reference Photos
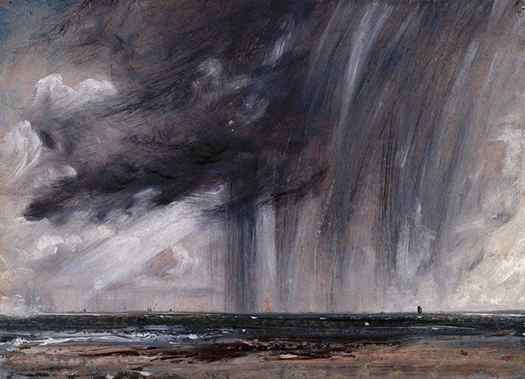
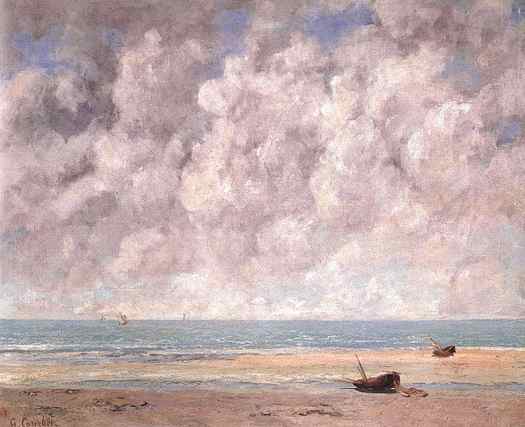
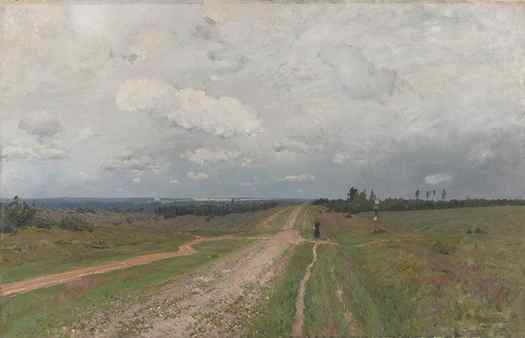
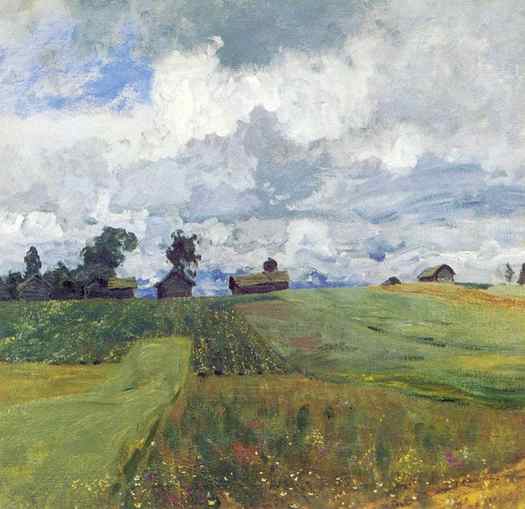
Here’s a gallery of cloud reference photos for you to use as reference material. You can see an example of what’s in the gallery below.
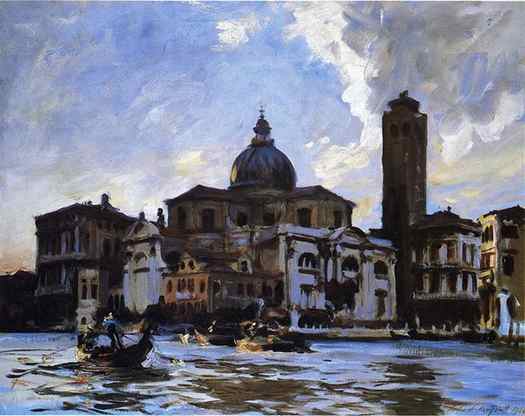
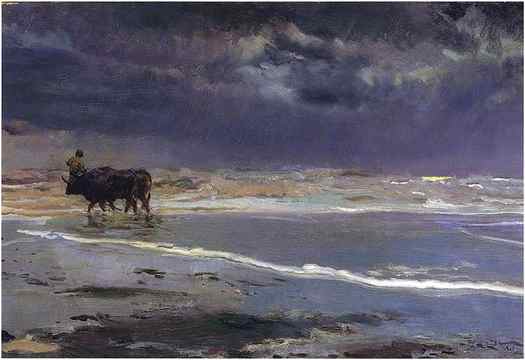
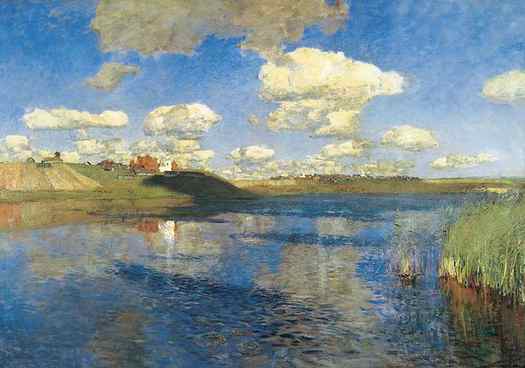
Here’s a gallery of master cloud paintings for you to use as inspiration. You can see an example of what’s in the gallery below.
Key Takeaways
- Clouds are fleeting and transient, but that doesn’t mean you should ignore structure and form. Seeing clouds as basic shapes and forms will help you simplify and organize all the information.
- If you cannot make out distinct forms, use shape to simplify the clouds.
- Focus on getting the fundamentals of light and color right first, then inject your creative flair, if at all.
- Your use of color will depend largely on the nature of the light, the overall key of your painting, and the overall theme.
- Much like the human body, nature also has a gesture. It’s what will give your clouds a sense of life and movement.
- You will mostly be dealing with soft and lost edges, plus a few hard edges for highlights and perhaps dark accents.
- It doesn’t matter how well you paint the clouds if they don’t fit in with the rest of the painting.

Want to Learn More?
You might be interested in my Painting Academy course. I’ll walk you through the time-tested fundamentals of painting. It’s perfect for absolute beginner to intermediate painters.
I appreciate you taking the time to read this post and I hope you found it helpful. Feel free to share with friends.

Draw Paint Academy
Enjoyed this post? Join over 123,000 artists who subscribe to the Draw Paint Academy newsletter.
109 comments on “How to Paint Clouds”
Jane
this is very informative. I am enjoying all of the “lessons” coming into my mailbox. Thank you. Reply


