Paint crafts do not have to always use the classic paint brush and bottles of paint. We love finding other ways and tools to craft with paint such as our Fork Painted Bears, Moon Craft and even our Puffy Paint. Like our Fork Painted Bears this flower craft uses plastic forks as our main crafting tool. Just some cheap plastic forks is all you need!
Process Art ~ Painting with flowers
My kids love painting, especially exploring new painting techniques. A few of our favorite painting activities often are created after a walk in nature. This time we were inspired on a walk home from the park, we discovered a large area of clover flowers. We decided to bring a few home for a simple art project. The kids had so much fun painting with flowers that we will have to do it again soon.
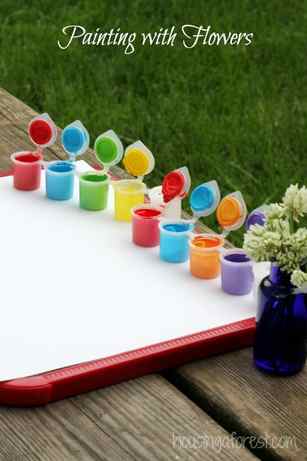
You will need:
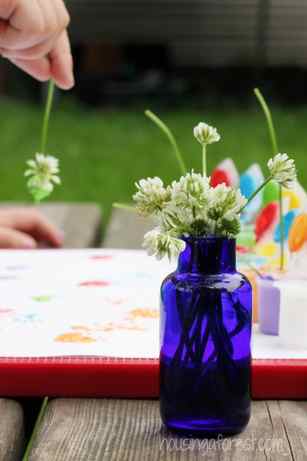
- Flowers ~ we used clover flowers we picked
- Paint
- paper
A simple invitation to play and create:
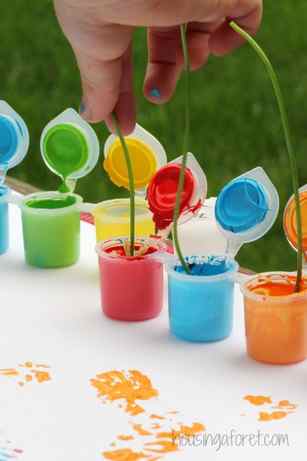
I trimmed the stems of the flowers, leaving just enough for a handle. Leaving the flower head to be used as the paint brush.
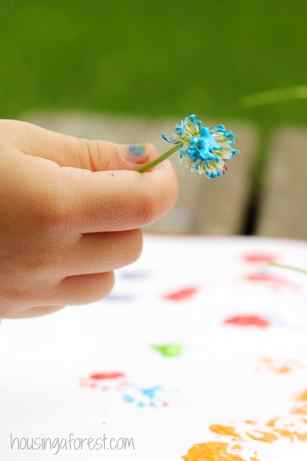
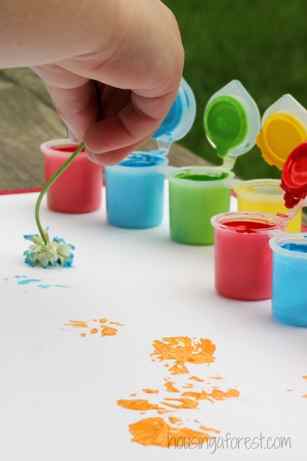
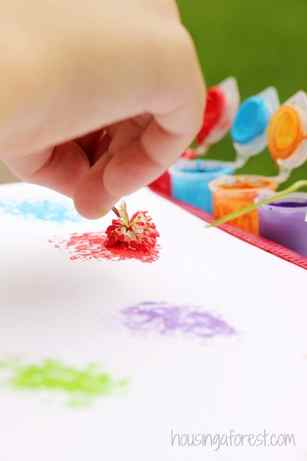
We found it worked best to use the flowers like stamps. Leaving beehive a simple print on the paper. However, the kids also enjoyed printing, swishing, dragging and twirling their little paint covered flowers.
This simple activity encourages kids to explore their creativity and imagination. Being an open ended activity, there is lots of room for kids to explore the transferred flower patterns, color mixing and the fun of creating shapes and pictures without restrictions or expectations.
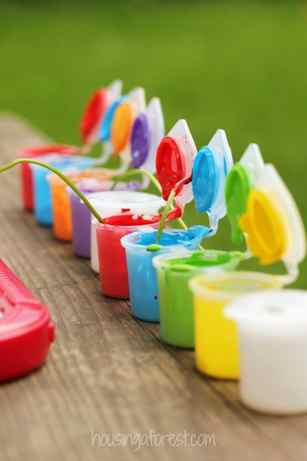
I couldn’t resist taking a picture of the little paint pots.
A perfect art activity for preschoolers.
If you loved this simple activity, then you will love my Painting without brushes Pinterest board. It is PACKED full of creative ways to paint with kids. Leave the brushes in the cupboard, and experiment with fun new ways to paint!

When a few of the older kiddos came home, they had a blast painting with flowers as well. I love this simple fireworks display that one of them created. They used the edge of a strip of cardboard to create the lines. Beautiful. I guess this activity is not just for preschoolers after all;)
Flower Pot Painting Made Easy
This post and photos may contain Amazon or other affiliate links. If you purchase something through any link, I may receive a small commission at no extra charge to you. Any supplies used may be given to me free of charge, however, all projects and opinions are my own.
Flower pot painting has never been so easy! I am about to show you a technique that you can use on your outdoor decor this summer to have gorgeous flower pots in a variety of styles. And yes this can be done in just 15 minutes or less! If you have missed any of our other clay pot ideas this week, be sure to catch up with day 1 of our series. You can also scroll to the bottom of this post and see what today’s bloggers have in store for you!
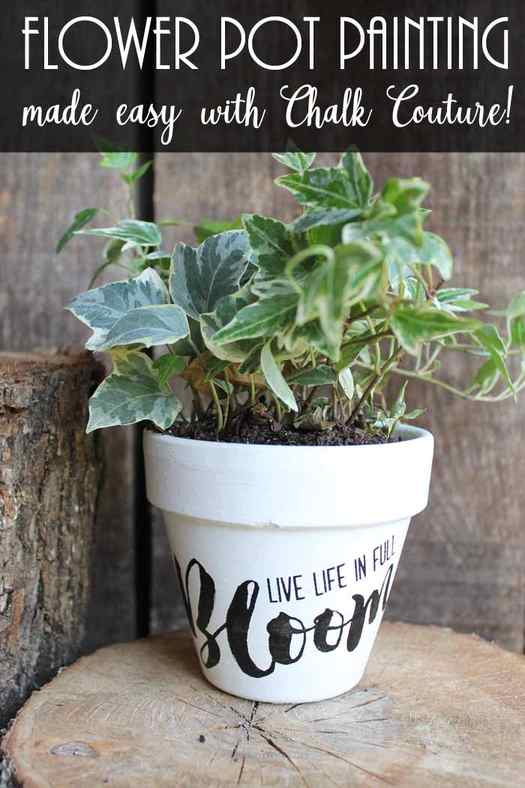
Table of Contents
Supplies Needed for Flower Pot Painting:
I am an independent designer for Chalk Couture and links below are to my shop where I earn a commission on each product sold.
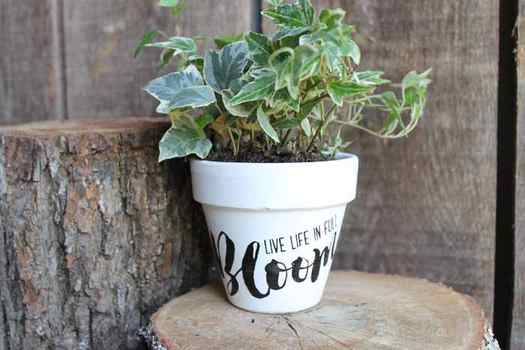
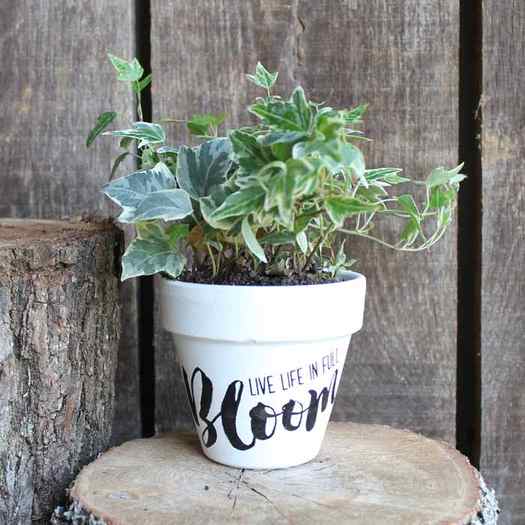
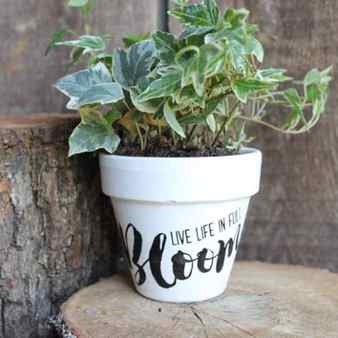
- Clay pots (painted with two coats of white outdoor paint)
- Live Life in Full Bloom Transfer
- Couture Ink in Black
- Squeegee
- Stir Stick
- Painter’s tape (optional)
- Clorox wipes
- Water
- Magic eraser (optional)
- Scissors
- Towel

It is so much easier to show you how this product works then to tell you. I am sharing a video below that explains the process. Trust me…you are going to love how easy it is!
Flower Pot Painting with Chalk Couture: Video Tutorial
Still confused? Click here to download our Chalk Couture Beginner’s Guide!
Can’t watch the video or missed some of the steps? Try our step by step instructions below!
Instructions for flower pot painting with Chalk Couture:
- Start with flower pots that have had a few coats of a good quality outdoor paint. Look for paint that is intended for use on terra cotta to get maximum coverage.
- Be sure to allow your paint to cure about 24 hours before adding the transfer to make sure it is really on that pot!
- Cut your Live Life in Full Bloom Transfer into pieces along the cut lines.
- Then remove the transfer from the backing paper. Be sure to pull top to bottom or side to side and not diagonally.
- Put the transfer on a bath towel to fuzz the back.
- Stick to your flower pot wherever you want your design.
- Then use a squeegee to make sure it is stuck well and to remove any air bubbles.
- You may also want to add painter’s tape around the edge of your transfer as the ink is permanent anywhere that you get it on your pot.
- Then dollop the ink on one side of the transfer.
- Use the squeegee to pull it across and ensure that you cover all areas of the transfer.
- Remove as much of the ink as possible and put it back into the container for use on another project.
- Then remove the painter’s tape and discard.
- Remove your transfer from the flower pot. Again pull top to bottom or side to side.
- DO NOT let your ink dry on the transfer. Put in a shallow pan of water if you cannot wash right away.
- Clean up any mistakes on your flower pot while the ink is still wet. A q-tip works great for this.
- Then set your flower pot aside to dry.
- Clean up your transfer with a Clorox wipe on the front and back. Note that the ink does have a tendency to stain the transfer. You can use a magic eraser to remove a majority of this staining if desired but it is not required. The staining will not hurt future uses of the transfer.
- Allow your transfer to dry completely with the sticky side up then return to the shiny side of the backing paper for use again. Remember that the company guarantees use for 12 projects but you can use these transfers so many more times!
- You will need to heat set the ink in on your flower pot to make it permanent. Do that by baking in a 350 degree F oven for about 30 minutes. Then your project is complete and ready for a plant!
Still confused? Click here to download our Chalk Couture Beginner’s Guide!
I told you this product would make flower pot painting so much easier!
With the wide variety of transfers available from Chalk Couture, you can add just about anything to your flower pots this summer! And it can be done in just 15 minutes! Now that is a win-win!
Print out this flower pot painting tutorial using the how-to card below!
Total Time 50 minutes minutes
Flower Pot Painting with Chalk Couture Paint
Flower pot painting has never been easier! Create colorful, fun flower pots using Chalk Couture paint that lasts long and looks great.
Supplies
- Clay pots painted with two coats of white outdoor paint
- Live Life in Full Bloom Transfer
- Couture Ink in Black
- Squeegee
- Stir Stick
- Painter’s tape optional
- Clorox wipes
- Water
- Magic eraser optional
- Scissors
- Towel
Instructions
Instructions for flower pot painting with Chalk Couture:
Start with flower pots that have had a few coats of a good quality outdoor paint. Look for paint that is intended for use on terra cotta to get maximum coverage.
Be sure to allow your paint to cure about 24 hours before adding the transfer to make sure it is really on that pot!
Cut your Live Life in Full Bloom Transfer into pieces along the cut lines.
Then remove the transfer from the backing paper. Be sure to pull top to bottom or side to side and not diagonally.
Put the transfer on a bath towel to fuzz the back.
Stick to your flower pot wherever you want your design.
Then use a squeegee to make sure it is stuck well and to remove any air bubbles.
You may also want to add painter’s tape around the edge of your transfer as the ink is permanent anywhere that you get it on your pot.
Then dollop the ink on one side of the transfer.
Use the squeegee to pull it across and ensure that you cover all areas of the transfer.
Remove as much of the ink as possible and put it back into the container for use on another project.
Then remove the painter’s tape and discard.
Remove your transfer from the flower pot. Again pull top to bottom or side to side.
DO NOT let your ink dry on the transfer. Put in a shallow pan of water if you cannot wash right away.
Clean up any mistakes on your flower pot while the ink is still wet. A q-tip works great for this.
Then set your flower pot aside to dry.
Clean up your transfer with a Clorox wipe on the front and back. Note that the ink does have a tendency to stain the transfer. You can use a magic eraser to remove a majority of this staining if desired but it is not required. The staining will not hurt future uses of the transfer.
Allow your transfer to dry completely with the sticky side up then return to the shiny side of the backing paper for use again. Remember that the company guarantees use for 12 projects but you can use these transfers so many more times!
You will need to heat set the ink in on your flower pot to make it permanent. Do that by baking in a 350 degree F oven for about 30 minutes. Then your project is complete and ready for a plant!
Tried this project? tag us to show off your work!
Love this idea for flower pot painting and looking for more quick and easy clay pot ideas? Try the links below!
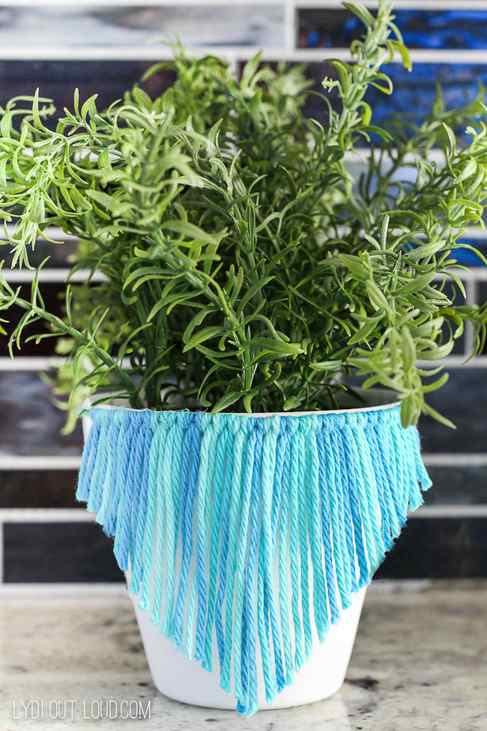
Start with this macrame inspired clay pot from Lydi Out Loud.
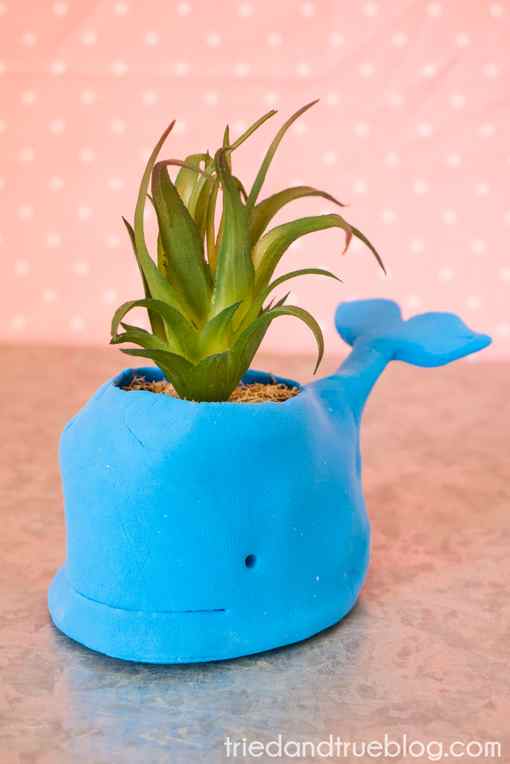
Then you might want to make this adorable whale clay pot from Tried and True.
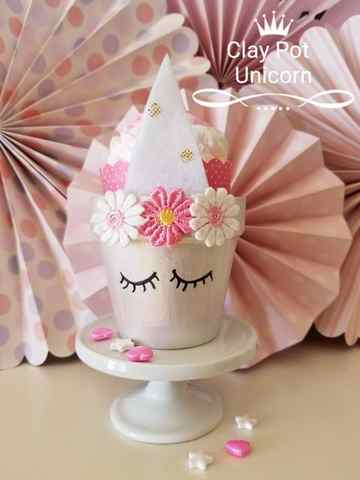
You can even make a unicorn themed clay pot like this one from Debra Quartermain.
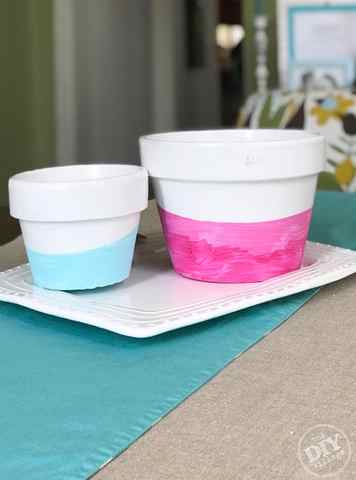
Love watercolors? You will also love this technique for creating watercolor clay pots from the DIY Village.
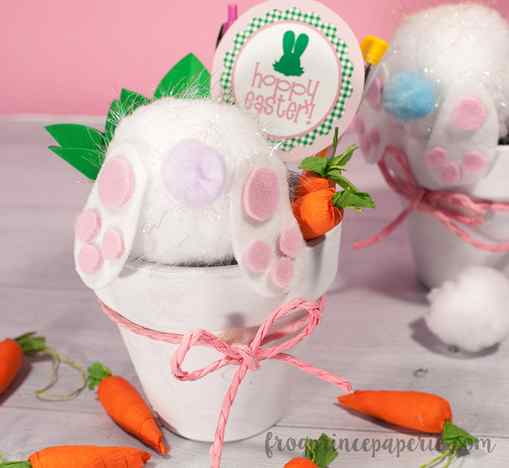
And a bunny butt is the cutest thing ever! Try turning a clay pot into a bunny butt pen holder like this one from Frog Prince Paperie.
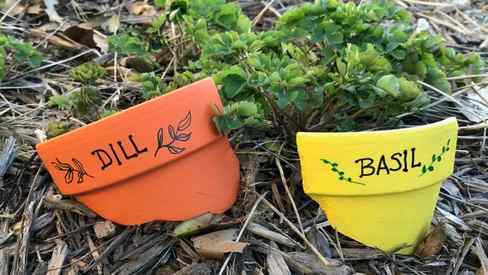
Have broken clay pots? No problem! Those can be turned into garden markers like these from PS I Love You Crafts.
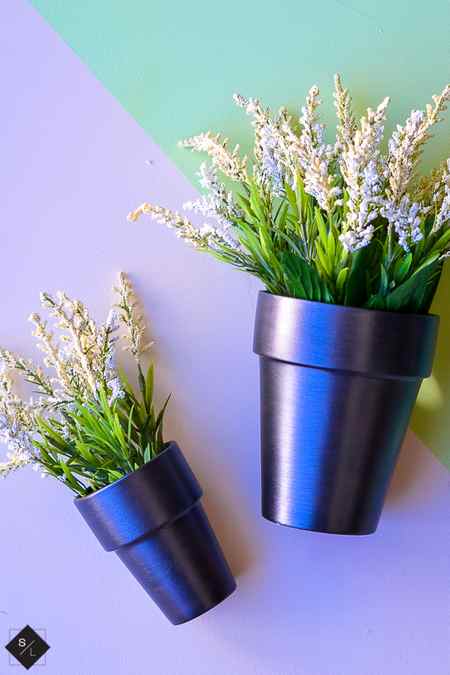
Maybe metallic is more your thing? You can also make these metallic clay pots from See Lindsay.
Or glitter! Yes glitter! My co-hostess for this series is 30 Minute Crafts and she is making these extreme glitter flower pots today!
So will you be trying flower pot painting with Chalk Couture or one of our other ideas today? So many ways to use clay pots in your crafting!
Chalk Couture Beginner’s Guide

Getting started with Chalk Couture? Sign up for our email list and then use our handy free printable guide to start creating chalkboard art in minutes!
Check your email to download and print your guide!
About Angie Holden
For over a decade, I have been sharing Cricut tutorials and craft ideas here as well as on my YouTube channel. My passions include teaching others to be creative and learning as many new things as possible.
How to Make Fork Painted Flowers
Before getting started, put a blob of paint in the colors you want on a paper plate or in bowls. Provide one fork per color. This will make it easy for kids to select the colors they want. They can share the forks being dipped into each paint color to avoid mixing colors.
- Dip the back of the fork in your paint of choice. Press it onto the white paper. You may need to rock it up and down slightly to have the whole fork press down. Go ahead and try a few on scrap paper…but it’s super easy!
- Press one flower of each color on the paper making some taller than the others.
- Using green paint and a thin paintbrush add flower stems to your picture.
- Draw and color in the leaves with a matching marker color.
- Cut a 2-inch strip of green cardstock. Add cut marks across the whole thing. Bend or fold a few of the strips make and glue the whole piece on top for the grass.
This is a fantastic activity to work on fine motor skills and motor control with little ones. Older kids will love making fun designs and drawing their own leaves for the flowers. Encourage them to add a sun and clouds if they want more detail in their picture. Display these colorful flowers around the house for your family and friends to admire.

What Can I Use Fork Flowers for?
These flowers are so much fun and can be used for a variety of occasions. We like to use them just for fun in the spring and summer while the flowers are starting to bloom, but they also make great gifts for loved ones. Use them to celebrate Mother’s Day or an upcoming birthday. They make super sweet cards anyone would enjoy receiving.
Add these spring flowers around the house as colorful decorations for the windows and the refrigerator or pair them with a fun story about flowers and all things spring. Painting with a different medium than a paintbrush will have your kids fully engaged and asking for more. I hope you enjoy creating these colorful spring fork painted flowers with your kids!

Want some more fun flower crafts to keep your kiddos busy? Create adorable handprint keepsakes with these Handprint Flower Pots. Make colorful flowers with these Paper Plate Flower Crafts. Use recycled materials and teach kids about recycling with these fun Egg Carton Flowers. Plus, make some delicious Flower Pot Cupcakes as a yummy treat.
Related

ABOUT KATIE
Katie is a wife and mother to two little boys and one little girl.She is a mommy blogger who loves crafting, diy projects for the home, cooking, and baking for her family.She enjoys making her house a home and encouraging other Momma’s in the crazy and blessed life of motherhood! Read more.
Created by Katie
Katie is a Christian, wife and mother to two little boys and one little girl. She is a mommy blogger who loves crafting, diy projects for the home, cooking, and baking for her family. She enjoys making her house a home and encouraging other Momma’s in the crazy and blessed life of motherhood!
Reader Interactions
Leave a Reply Cancel reply

Hey, I’m Katie!
Made to be a Momma is a place to embrace all things homemaking, sharing delicious recipes, diy craft tutorials, kids crafts and more!
Get The Updates!
Join the community and get our freebie, 10 Family Friendly Dinner Recipes using fresh & healthy ingredients


