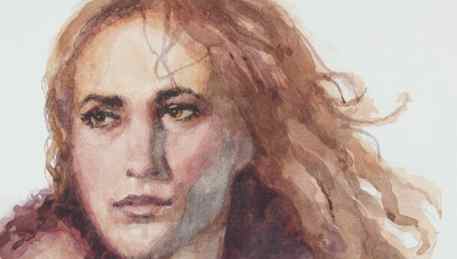
Portrait Painting for Beginners
Welcome to the most structured and comprehensive portrait painting course ever produced.
This course includes over 40 hours of video instruction, 24 self-study assignments, 27 painting demos, a color mixing guide PDF, and over 100 downloadable reference images to paint from.
Internationally renowned painter Joseph Todorovitch teaches you everything you need to know to start making masterful portraits, and features:
- Materials recommendations
- How to stretch a canvas and prepare panels
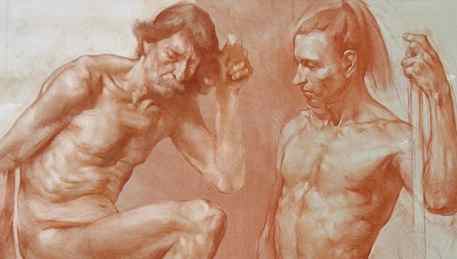
- How to work from photos (including analytical draw-overs) and from the live model
- How to master the Anders Zorn Palette
- How to finally nail color mixing
- Color theory
- Paint application
- Posterization
- Block-ins
- Modeling
- Brushwork
- Resolve
- And more!
This course leaves nothing to guesswork. Every concept is explained, demonstrated, and practiced until you have a handle on it, all presented in the format and quality that you have come to expect from New Masters Academy.
Premium Subscribers get even more with nearly 300 new portrait images now available in our massive image library.
NOTE: This course is suitable for beginners, but some drawing experience is recommended. This course can be followed along with using traditional media such as oil paints and acrylics, or digital painting applications.
Become an Artist Who Inspires: Access All Art Courses Free For 7 Days


Materials, Supports, Painting Basics
If you are interested in learning how to paint the portrait in oils, you will need to know your materials from which brushes to buy, and how mediums work, to how to stretch your own canvases and prepare your wood panels. Learn how to make your first brush strokes, how to mix a value scale, and how to set yourself for success as a painter.
Grisaille Portrait Exercises
Before learning how to paint with full color palettes, artists for centuries have begun using only a mixture of black and white paint known as grisaille. Learn how to use this excellent training approach to help you learn how to mix and apply paint, simplify your subject and draw with paint, design posterize shapes for value clarity, and how to make form read correctly, all without color!
Color Mixing Basics
Learn the most essential information about color theory and mixing you need to paint figures and portraits. You will learn how to mix colors to achieve proper value and temperature as well as the famous Anders Zorn palette, which is a useful palette for painting people.
Zorn Palette Painting Exercises
How do value design and color design work together in a portrait? What is color temperature and how do you apply it? How do you keep your paintings from getting muddy, or unclear? As you did before in the grisaille lesson, here you will do a 4-up painting thumbnail assignment as well as a longer portrait, applying concepts such as contrast, posterization, form, edge and brushwork and the focal point and first read.
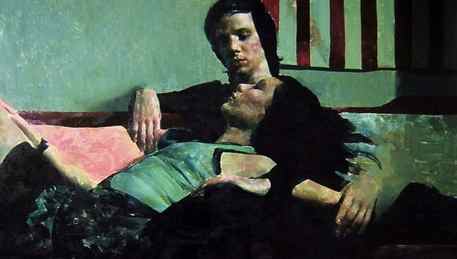
Long Pose Portrait Demo
Joseph will share his portrait painting process in a long-form demo from the live model. Building upon all of the previous lessons, Joseph will now attempt to create a more finished work, the way he would develop his own gallery pieces from his home studio. The first portion of this demonstration includes instruction in real time whereas the latter portion is time-lapsed with music underneath, which allows Joseph to focus on his work without the added burden of speaking.
2-Hour Portrait Assignment: Amanda
So far you have learned the concepts, and basics of painting the portrait, it’s time to start to put it into practice with a series of timed portrait paintings, each with a new model. In this session, Joseph paints a two-hour oil portrait from life from our model Amanda, with a special focus on drawing accuracy and value design. You can follow along with Joseph using the reference images provided.
2-Hour Portrait Assignment: Margaret
Paint a two-hour oil study with our model Magaret. After a review lecture on color theory and mixing with Joseph, you will begin your portrait by using our provided reference images and following along with Joseph’s process. The focus of this portrait is solid color choices and how those colors relate to value design. This lesson included a downloadable PDF on color mixing.
2-Hour Portrait Assignment: Jeff
Paint a two-hour oil study with our model Jeff. This time, you have the option to paint the same pose as Joseph with the provided reference and go through the entire exercise following along stroke for stroke, or challenge yourself to one of the other images and try to follow along with the process reference to the demonstration video. The focus for this session is on establishing solid structure and turning the form with light.
2-Hour Portrait Assignment: Tracey & Vanna
Paint a two-hour oil study with our model Vanna (following along as Joseph paints another model, Tracey). With more painting experience under your belt, you will begin to focus on getting further in the allotting two hours, including choosing an area of the painting for your first read. This focal point, will help you control your viewer’s experience and as your proceed through this course you will build greater and greater confidence.
2-Hour Portrait Assignment: Ryder & Dorian
Paint a two-hour oil study with our model Dorian (following along as Joseph paints another model, Ryder). You will focus on developing your focal point with more resolve than the rest of the painting. This is a good opportunity to try a variety of brushstrokes and to get more experience pacing yourself throughout the timed assignment.
2-Hour Portrait Assignment: Mather
In this session, you will do a two-hour oil painting with our model Mather. You have the option of painting the same post as Joseph, following along with the video demonstration stroke-for-stroke or you can choose your own pose and reference Joseph’s demonstration as you go. Mather has a beautiful color to her hair, which will provide a new challenge for you to proper mix and balance.
2-Hour Portrait Assignment: Amir & Brett
In this session, you will do a two-hour oil painting with our model Brett (following along as Joseph paints another model, Amir). If you choose to paint Amir, you’ll be challenged to work dark against a light background. Focus on getting as far as you can within the two-hour time limit but also in being experimental with your approach. Don’t be afraid to take risks!
2-Hour Portrait Assignment: Ariel
Paint a two-hour oil study with our model Ariel. In Joseph’s demo this time he will begin more expressively and loosely, relying less on drawing and more on big brushwork. You have the option of painting the same post as Joseph, following along with the video demonstration stroke-for-stroke or you can choose your own pose and reference Joseph’s demonstration as you go. Our references include simple more neutral poses of Ariel as well as some expression images. If you want an extra challenge try to capture one of the expressions withing your two-hour time limit!
Final 4-Hour Portrait Assignment: Yoni
In this final session, you will do a painting with our model Yoni. For the last nine poses, you have limited yourself to only two hours for each portrait. This time set your timer to a full four hours and see how far you can develop your painting. Again, you have the choice to follow along with Joseph stroke for stroke or to choose a different pose. Remember to bring your resolve/rendering up in one major area at a time and try to mentally plan your strategy before beginning!
WHAT WILL YOU MASTER?
Every Old Master had two things in common: hard work and a quality art education. You have what it takes to become a New Master and we have the world-class art instruction to guide you there. Start your 7-day free trial today to gain access to this course and every course we’ve ever made.

* Free 7-day trial available for new subscribers only. If you are already a subscriber, watch the course here.
How to Paint
Read this book now
Share book
English
ePUB (mobile friendly)
Available on iOS & Android
eBook – ePub
Book details
Book preview
Table of contents
Citations
Start Painting Today!Covering the three most popular types of painting: watercolors, acrylics and oils, this comprehensive step-by-step guide provides basic information on materials and techniques as well as an exciting series of demonstrations aimed at complete beginners. The unique approach of this book is so simple that the reader can start immediately on original and exciting projects. Each section has practical information on materials and equipment and includes a gallery of work by various artists to inspire the beginner. The projects cover all types of subjects, including landscapes, still life, people, flowers, animals and buildings. Within each section the demonstrations provide instruction in a whole range of different techniques from the basic brushstrokes to using resist and painting with a knife. Filled with stunning artworks and inspiring projects, this book will help beginners to achieve immediate and impressive results with a minimum of practice.Inside How to PaintComprehensive step-by-step introduction to painting for aspiring artists.Even complete beginners can quickly achieve immediate and impressive results.Covers all aspects of painting, including acrylics, oil paintings and watercolors.Learn to paint landscapes, still life, people, flowers, animals, and buildings.38 step-by-step projects each illustrate a different painting technique.Practical advice on choosing the best materials and equipment to get the most out of your painting.Includes inspirational galleries and essential basic techniques sections to develop your artistic skills.More than 350 beautiful color photographs.
Frequently asked questions
How do I cancel my subscription?
Paint by Number Tutorials for Beginners
Paint by numbers we have today is nothing like you’ve seen back in the days! We have so many different designs with various levels of challenges. Our kits take away the scary part of the painting and leaving only the fun relaxing parts for you to enjoy. Begin your first step into art therapy at home.
If you are still unsure about paint by numbers and what it actually is, you can head on over to our “ What is Paint by Numbers? ” article to read more about the craft. Hopefully it can help you decide if it is the correct craft for you to dip your toe in. Or even take a peek at out “ What is Diamond Painting? ” article.

Things you would need!
You don’t need to look for much, as all we got you covered! These are what’s already in your kit:
- Paint by numbers canvas – Either rolled or framed, this is your main play area. Each enclosed area is going to be identified by a number. This number relates to the color that supposes to be painted there.
- Paint Pots – Match the color in the label to the area is the canvas!
- Paint Brushes – We give you four paintbrushes in various sizes to cover different sized areas. But if you are a master crafter, feel free to bust out your fancy artist’s brush!
Other things you would need to grab from around the house are:
- Water container – with clean water in them, I like to have a couple of them handy to wash my brush and keep them damp.
- Tissue paper or old rag – To clean your brush and dry them off between colors.
Before you start painting.
There are a few things that you can do to make the whole experience smoother. Pick and choose which ones you think you would want to do!
Labeling your pot!
As you noticed the paint pot may not come with the label of numbers ranging from 1-24 like shown on your canvas. It’s time to do that, please refer to your color guide and use the provided number label to make sure the right colors go to the right number.

Flatten your canvas
This only applies for the ones that get their paint by numbers kit with a rolled canvas instead of pre-framed. You might have to do a few things to make it completely smooth, from all of the wrinkles and curling. You can check out the detailed tips on our “ How to Flatten Paint by Numbers Canvas ”
If you are someone that enjoys working on easel than a flat table, you can also mount your rolled canvas on a wooden stretcher. You can get yours with us: “ Original DIY Wooden Frame ”. Or you can mount your rolled canvas on a board or foam.
Swatch your colors
You can swatch your colors on the sides of the canvas, or behind it. Swatch the color and its corresponding numbers in the canvas.
This is not a must but this will help you understand the color palette. This helps you know how each color will turn out once it has dried ahead of applying them in your artwork. As well as the texture of each color.

Applying a thin layer of clear gesso
Your canvas come primed from Craft-Ease, but we have heard from our community that applying a thin layer of clear gesso helps improve the grip of the canvas and makes paint applications much smoother.
Make sure that you are applying a clear gesso, instead of a while gesso, you do not want to cover the printed numbers and lines on your canvas.
YOU ARE READY TO GET PAINTING! (finally)
Our community member, Melissa, shows us her unboxing and painting process. Along with some nice tips she has for your first painting. This will help you keep your place and enjoy the process.
Go to a well lit place where you will not be disrupted, and relax!
Where to start from?
To be honest, there is no rule of where to start. Whatever floats your boat.
That being said, we tend to start with lighter colors. Since mistakes are easily covered by layering a darker color on top of it. And I usually want my lighter color to dry first since I might need a couple more layers to form a completely opaque painting.
Melissa does have a really good tip on the direction where to go though. To avoid smearing your paint that has not dried, try to move in a direction that prevents you from laying your hand on wet paint.
So if you are right-handed, working from left to right helps. If you are a leftie, working from right to left is best. And always work from top to bottom, so that your hand does not rest on wet paint.
We would also like to recommend working from largest areas first, this way, you can see your painting shaping up much quicker. You will feel more motivated to finish the paintings, as opposed to the slow progress you will get if you start from the smallest areas first.


