Let’s say we are done with the tree. Going forward we can start adding simple leafs and bushes. What kind of tree does not have leafs? ( I mean some don’t, but let’s go for a happy tree ).
FREE Step by Step Christmas Tree Painting Tutorial
Do you want to learn to paint, but don’t have any experience?
Are you looking for an easy painting to get started on?
Or maybe you’re stuck in lockdown and looking for something creative to try?
This easy online painting tutorial is your answer.
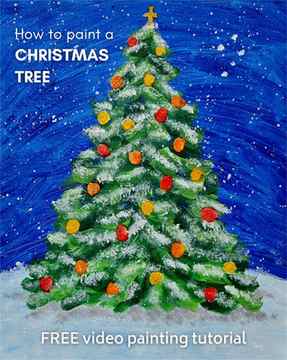
Watch my video tutorial and learn to paint your own Christmas Tree.
I break it down into easy to follow steps and show you how to paint a Christmas Tree from start to finish.
You’ll learn some basic painting techniques and have some fun getting creative . and splattering stars for the night sky!
This one is perfect for beginners, great for all ages and fun to do together!
WHAT YOU’LL NEED:
- acrylic paint colours: cool blue, deep green, light green, black, white, warm red, yellow (or any of your favourite colours)
- something to paint on, I use a small rectangle canvas.
- a small to medium round brush and a small bristle brush. I use a #4 round brush and a #4 bristle brush.
- hair dryer (to speed up drying)
- paper plate (or something to put your paint on)
- a cup or jar of water (to clean your brushes)
- paper towels or an old rag (to dry your brushes)
Once you have all your supplies ready, click the video image below to watch, paint, learn and have fun!
Still need to shop for art supplies? I’ve got an incredible FREE shopping list of essential art supplies just for you. This comprehensive list includes tips on where to find the best prices. Say goodbye to wasting money on the wrong materials – this guide will make buying your art supplies and getting set up with the right materials quick and easy . Click here to grab your free shopping list now.
What next?
If you’d like to paint with me again now, check out my On Demand Painting Tutorials I’d love to help you create your next masterpiece!
WANT STEP-BY-STEP GUIDANCE TO LEARN TO PAINT , along with inspiration and support from an incredible community of like-minded individuals? Look no further! Introducing Paint Club, our monthly online painting membership. Join a community of aspiring artists and gain access to a proven system that will help you paint with confidence and joy, creating beautiful art you’ll be proud of. Don’t miss out on this opportunity to elevate your painting skills and be part of an amazing artistic journey. Click here to check out Paint Club and unlock your artistic potential
Sketch
I usually start with looking at references. When I am out, I try my best to take as many pictures as I can. It’s good to have your own library of pictures.
After I have all my references, I usually start with simple sketching.
There are many different trees you can find online. A good way to spice up your tree drawing is to have more dynamic look to it. Use action line to see start your drawing.
You can play around with lines and different angles. If you have many trees, then it’s best to stick to static and straight lines. In my case I am using one main tree, which is why I can play around with it so much 🙂
You can also see that I added ground / grass here. That helps us to see that the tree is placed somewhere and not just floating.
Don’t forget about the rule 3!
Big, medium, small. It’s a nice rule that keeps me organized when making random organic objects like trees or rocks.
Flats
What are flats? Flat is just one color that will help us create the base to work with for out artwork.
My favorite way to do it is to just use lasso tool.
You can access it by using M shortcut. In the tool property there are two options. Selection mode is how selections will behave. I usually set it to the second button. That way if I select twice, it will just combine the selections.
If you hold Alt or Option on mac, your lasso will start deselecting. It’s an easy way to get started with flats.
After selecting, pick a color that will work for your art. If it is a tree, I will most likely use some dark brown/red to get started.
Once you have everything selected, you can just use Alt/Option + Backspace/Delete to use the fill color.
After you have your flats. You can always create a new group of layers and use that flat to mask it.
Just like this! You can set it to a layer or a whole group all together. To create the selection again, just do Ctrl/Command and left click on the layer. This will create the selection of that layer.
Shading
Once you have flats, it’s a good time to start rendering a little bit. There are different ways to do it, but my general approach is start with simple lights and major soft shadows.
Tree is basically made out of cylinders. If you know how to shade a cylinder, then you are good to go.
I just use Overlay with a slightly bright yellow. For my brush I simply use my Airbrush that I have been using for years.
Adding light to the middle of the tree. You can always find a good reference in case you are struggling.
After that I usually use a Multiply layer to add some light shading to the darkest parts. In this case that is going to be where the tree is meeting with grass. The light will have a hard time getting in there. I also added some brightness to the grass.
Easy Tree Painting for Kids
- Thin white cardstock
- A small plate (to draw around)
- Pencil
- Scissors
- Paint sticks (in various colours)
- Black and white acrylic paint (or children’s paint)
- Small piece of cardboard or a small ruler
- Paintbrush
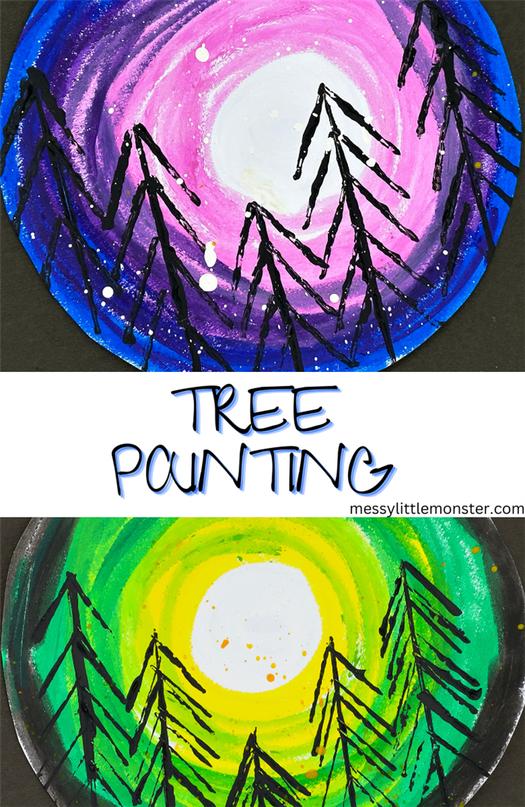
STEP 1: Cut out a circle
The first step of this tree craft is to cut your thin white cardstock into a circle. To create a perfect circle place a small plate on top of your cardstock, draw around it, and then cut it out.

STEP 2: Create the background
Now it is time to add some colour to your circle of cardstock to create the background for your trees.
Choose about 4 paint stick colours that you think will work well together, on the example below we used white, pink, purple and dark blue. You are going to use the paint sticks to create several circles that gradually get larger.
Start by using one of your paint sticks to create a full circle in the centre of your cardstock (white is a good choice if you want it to look like a moon). Then go around the first circle with a second colour, followed by a third and fourth colour until your white cardstock is completely covered in colour.


Paint sticks are a great option to choose for the background as they dry really fast, this means that you don’t need to wait for them to dry before moving on to painting the trees. However, if you don’t have paint sticks you can paint your background using regular paints and then wait for them to dry.
STEP 3: Paint trees
For painting the trees we are going to use a really easy painting technique. You will need to cut a piece of cardboard into a small rectangle, this will then be used as a stamp to create your tree painting.
Spread out a thin layer of black paint onto a paper plate or paint pallet. Then dip your piece of cardboard into the black paint and then onto your background.
Start by painting the trunks of the trees. You can do this by using your paint-covered cardboard to create several vertical lines.

Then add the branches to your trees by using your cardboard stamp to create lots of smaller lines coming from the vertical lines. (see the image below)

Experiment with using different thicknesses of cardboard as your stamp as the effect can vary slightly.

As an alternative to printing with a small piece of cardboard you could experiment with using the end of a small ruler as your stamp as we did for our green version of this tree art project.


STEP 4: Splatter paint (optional)
Your easy tree painting is now complete, but if you wish you could add a few splashes of paint as a finishing touch.
Kids always seem to love splattering paint and it can look really effective. To add splatters simply dip your paintbrush into white paint (or any colour of your choice) and then hold your brush over your tree painting and tap the paintbrush firmly against your finger.

How fantastic does this tree painting look! Have fun trying out different colour backgrounds, you could even make trees for each season!

The pink, purple and blue background with white paint splattered on it has a real winter feel about it. It looks great against a black background as it makes the colours really pop.

We also make a version of this tree painting in greens and yellow, complete with yellow splatters that has a bit of a spooky feel. It could be fun to create a version like this close to Halloween!

Our third version was created using yellow and red paint sticks and it has a sunset feel to it.

There are so many different colour combinations to try so have fun experimenting.

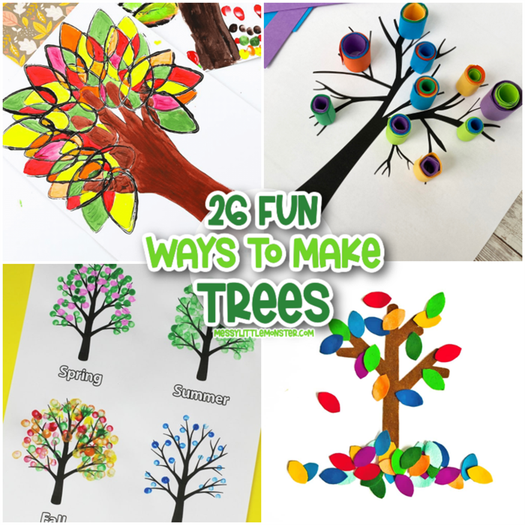
If you enjoy this tree art project you might also like to browse through our list of more tree art projects.
We hope that you have a lot of fun with this easy tree painting for kids. It is such a fun and easy painting idea that kids are sure to love!

Follow us on Facebook, Pinterest, Twitter, Instagram, Youtube or Subscribe for free email updates!


