You can paint brown on top of blue without any color distortions. For this reason, you can start by painting the entire scene with turquoise watercolor. Paint with water first to make the color flow easily.
How to Paint Frothy Watercolor Waves in a Dramatic Seascape

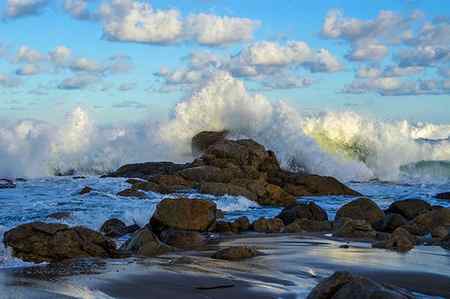
My website has a tool that helps you find great reference photos for sketching and painting. The other day, I wanted to practice sketching seascapes. Lo and behold, I stumbled upon a beautiful, dramatic photo that looks almost like a painting. That’s what inspired this tutorial on how to watercolor waves.
Looking at the frothy waves, I thought, “Yeah, I can do that with my sponge and white gouache.”. Follow this step-by-step tutorial, and you too can watercolor a fresh and breathtaking seascape. When you add colored pencils for details, the project becomes an easy one. There is no need to master intricate techniques for painting water with watercolor.
Table Of Contents
- Step 1: Assessing the reference photo.
- Step 2: Outlining the rocks and the horizon.
- Step 3: Painting the sky and sea with watercolor.
- Step 4: Painting the rocks with watercolor.
- Step 5: Shadows and highlights.
- Step 6: Paint frothy watercolor waves and clouds with white gouache.
- Step 6: Draw texture and depth with colored pencils.
- Step 7: Finishing up the watercolor waves.
Step 1: Assessing the reference photo.
The contrast between the turquoise sky and the dotted clouds is striking. The frothy waves look very much like the clouds, and this makes the photo so unique. The rocks have a gorgeous dark brown base color with tints of different brown hues. The unruly ocean is a much darker blue than the sky.
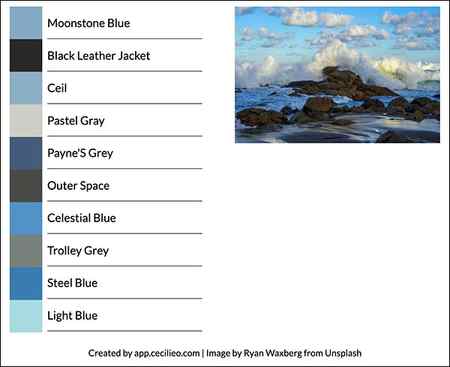
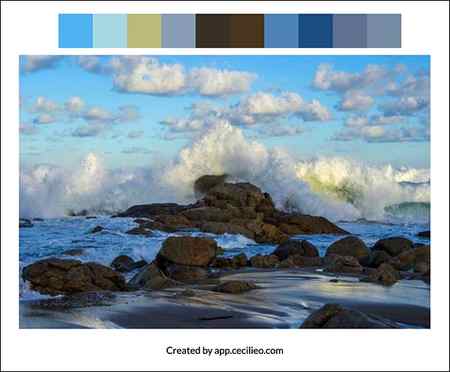
At first, I used the auto color picker to see the range of colors in the photo. Noting that the hint of green was missing, I used the manual color picker. This way, I could select the color palette myself.
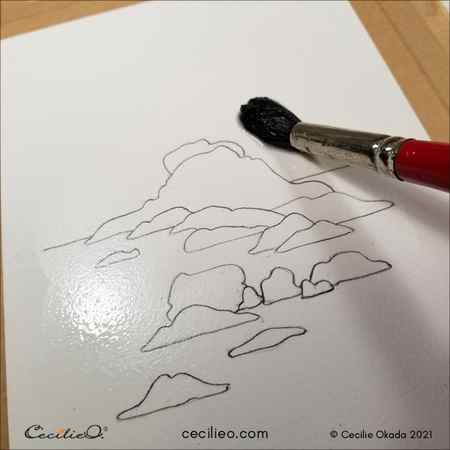
Step 2: Outlining the rocks and the horizon.
Rocks come in many shapes and sizes. There is no need to get angles and proportions right. Unlike plants and animals, a line out of place will not make the rocks look wrong. I outlined directly onto my watercolor paper. You can download my drawing in the free One Tree Art Club Library. Learn how to transfer the outline to watercolor paper.
Step 1: Mix resin
You’ll want to mix enough resin for art to cover your painting surface. For this 12-inch square tile, that was 6 ounces.
Pro tip: You can use this [FREE] resin calculator to help you know how much resin to mix for your resin painting.
Step 2: Color the resin
Then, color the little bit of leftover resin in your original cup with silver metallic spray paint.
Cover the painting surface with alternating ribbons of teal and blue resin. Then, add stripes of white resin. Use a heat gun to push white resin over the blue and teal. That’s where you’re going to get the foamy-looking ocean waves.
At the end, add thin lines of the silver resin. It helps to add to the depth of the colors. Plus, the solvents in the silver paint will create cells as the resin cures.
It’s hard to describe how to make ocean waves with resin, which is why I’ve got this video:
Step 4: Show off your art

I love how this resin painting perfectly captures heavy ocean waves.

This painting will look great framed or can be a serving tray for a party.

The silver makes the painting look like the deep end of the ocean.


