Get a small dab of white paint on your smallest brush and paint dots on top of the blue sky. Try to spread them out and vary the sizing.
How to Paint Pumpkin Rocks

Usually, some years, I get inspired to plant pumpkins and marvel at how well they are doing until they fill the whole garden. Then we pick them and realize we don’t cook with them much.
As a result, the year after that, I decide – no pumpkins! However, by the end of the summer, it seems like something is missing from our garden, and I long for a little pile of pumpkins at my doorstep. So, next year, I plant pumpkins again…
This year, I didn’t have pumpkins. Alas! Instead, I painted a bunch of pumpkin rocks to satisfy my autumn craving. After all, plump and round little stones are very much like miniature pumpkins.
Materials for Painting Pumpkin Rocks
(the post contains Amazon affiliate links to the products I used)
- rocks
- acrylic paints (red, yellow, brown and white)
- ink pens (can be substituted with black acrylic paint)
- (optional) outdoor varnish if you plan to keep them outdoors
How to Paint Pumpkin Rocks

1 — Paint the rocks orange. If your set of acrylic paints doesn’t include orange, as mine didn’t, mix yellow and red. Different shades of yellow and red add character to the pumpkins, like natural variation. I don’t use primer for painting rocks, but I do use heavy-body acrylics to give them a thick layer in one coat. You can choose whether to use heavy-body acrylics or prime the rocks with gesso first. Alternatively, you can simply give them several coats of whatever paint you’re using.
2 — Dilute brown paint with water to make it semi-transparent and mark the ribbed structure of the pumpkins’ sides. Use undiluted brown for painting pumpkin stems.

3 — Dilute white and brush it around the ribbed edges, giving them a bit of form.
4 — Add a couple of highlights to the stem as well.

5 — Use ink pens (or a very thin brush with black acrylic paint) to outline the facial features. You can make them look like traditional carved pumpkins – I did something like that when I painted garden markers. These guys have a more animated look with white in their eyes and teeth, which is the next step – paint eyes and teeth with white. Last, add details with an ink pen (or a brush) – eyelashes, irises, eyebrows, etc.

Mini pumpkin painting supplies
- paint brushes
- paint palette
- water cup
- paper towels
- mini canvas
- acrylic paint
- light green
- dark gree
- navy blue
- medium blue
- brown
- orange

Step 1: paint set up
Drop a few blobs of paint on your palette.
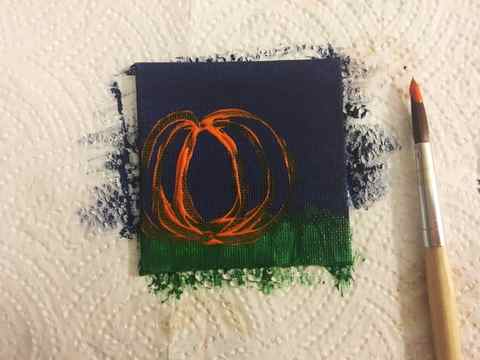
Step 2: paint the base and pumpkin outline
I’m combining a few steps into one because it’s all prep.
2a: Paint the top 3/4s of the canvas navy blue . Mix in some medium blue here and there. Paint horizontally for the sky. Let it dry.
2b: Now we’ll paint the grass. Paint the bottom 1/4 of the canvas dark green . Mix in some light green . Let it dry.
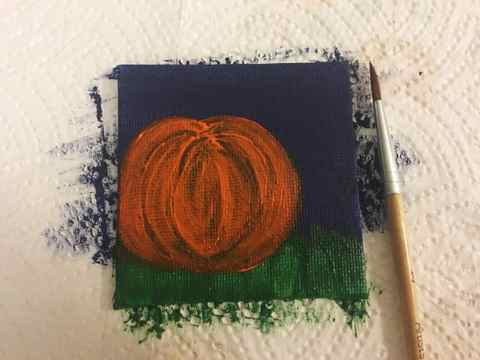
2c: Now the fun part: the pumpkin. Paint an orange oval in the space slightly off center of the canvas. This is going to be the center of the pumpkin.
2d: Now paint half an oval on each side of the original oval.
2e: Repeat step 2d on each sides of the half circles you just painted. Let it dry.