Sketch a star shape on the sides of the birdhouse. Mark the location where you wish to drill holes. (If you are using this for an outdoor birdhouse, it’s nice to have a little ventilation for the house. But, feel free to skip this step if you wish.)
Painting Craft for Kids: Spring Birdhouse

When the days are just starting to warm up around here, I like to start thinking spring. This is the time to start looking at seed catalogs and thinking about how I’m going to fill up my gardens. This cute spring painting craft for kids takes one of those little craft birdhouses and turns it into a work of art.
If you have older kids and want a more in-depth project, you could even make the birdhouse yourself. But these painted birdhouses were simple, fun and something I’ll bring out for decor each spring. I absolutely love crafts for kids that are usable or something I display long-term.
Getting Started: Birdhouse Craft Supplies

I have all kinds of acrylic paint on hand. The craft or artist grade stuff works best because it isn’t really thin and runny. I really don’t like kids’ grade paint, so I don’t even buy it. The only downside is–this “real” paint is not washable at all if you get it on clothing or let it dry on surfaces.

You will also need brushes, the craft birdhouses and paper plates (or paint palettes). You can either paint the birdhouses a solid color and let them dry completely or just work with the plain wood. The nice thing about paining on a first layer of color or white means there aren’t any blank spaces without paint on the birdhouse.
Painting the Birdhouses

To start, I didn’t give them a lot of direction. I picked out a select color palette and told them we were going to be doing flowers. I find with projects it is good to set parameters of some kind. Those parameters may be about what they can/can’t paint, how much has to be covered, what colors they use, etc. So, for example, when doing a craft for kids, I might give instructions like:
“You can paint whatever you want.” or “We are only painting flowers today.”
“What colors would you like?” or “Here are 5 colors for you to work with.”
“Start with _____ color.” or “Do a background first and we will add ____ on top.”
“Pick a brush.” or “Start with this (big, small, medium) one first.”

While it might seem like the rules limit their creativity, I find it usually pushes them to be more creative–especially if I change those rules every time. When it is a free-for-all (which I also do with them), they tend to create in a certain way that feels comfortable for them. Providing some (or a lot of) structure when doing crafts for kids will push them to think outside of their own box and try something new.
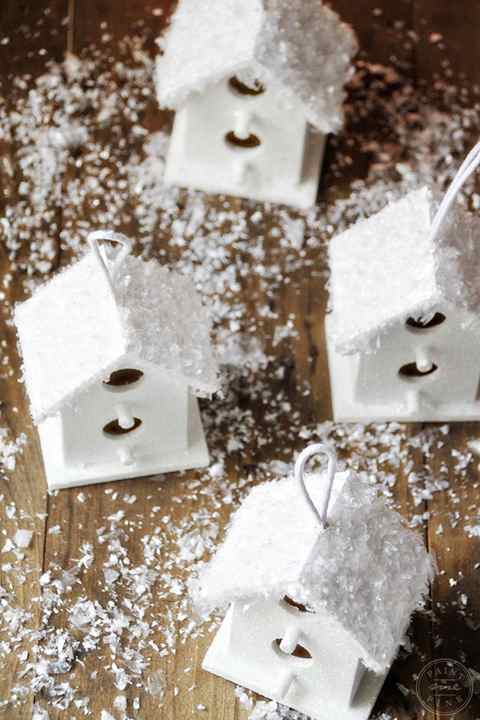
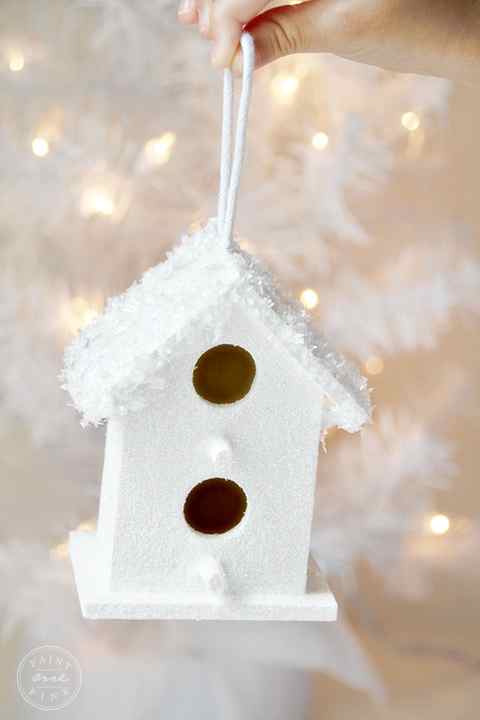
DIY Snowy Birdhouses
Last year I made handmade ornaments for our Christmas tree. And each ornament was inspired and dedicated to the loved ones we’ve lost over the years. These sweet little bird houses were dedicated to Great Grandpa Mario who loved making and painting birdhouses. His birdhouses had amazing detail work and beautiful sceneries painted on them.
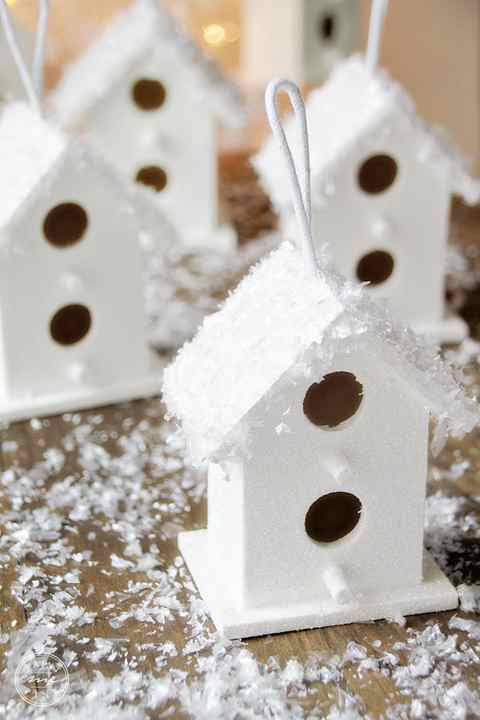
I wanted to dedicate these snowy birdhouses to him. They are simple but they look beautiful on the Christmas tree. This is a simple craft that you and your little ones will enjoy making together.
My sweet little Juliet and Scarlet helped out so you will see their tiny little hands and fingers in some of the photographs.
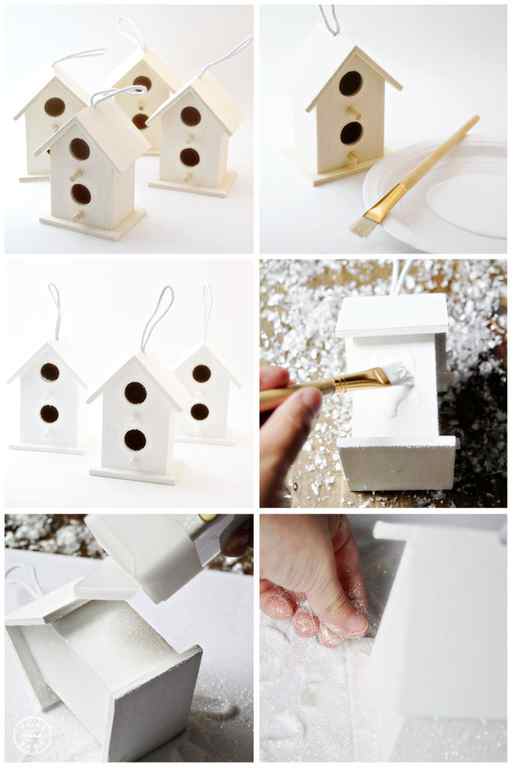
Materials Needed:
Wood Birdhouse (you can purchase these in any craft store)
Mod Podge
Fake Frosty Snow
White Acrylic Paint
Small Foam Brush
Paint Brush
White Glitter (I used Recollections Extra Fine Glitter in the color Glitz)
Steps:
1. Paint the birdhouses white or color of your choice.
2. Let paint dry then apply Mod Podge to desire areas on birdhouse, using foam brush and sprinkle glitter over it. Work in small sections.
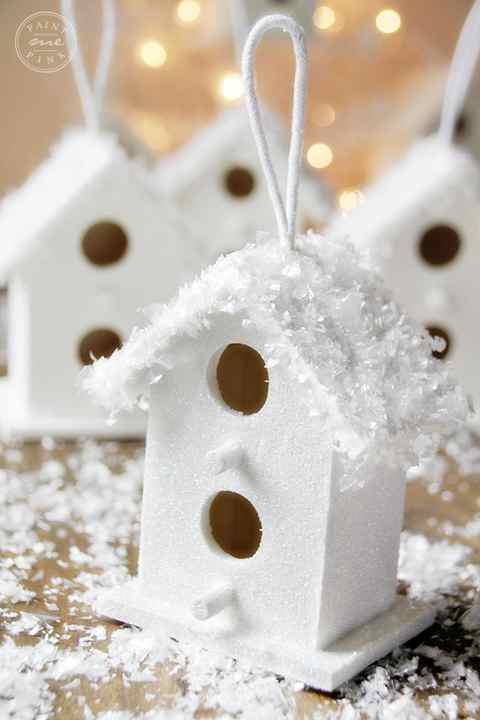
3. After adding glitter to your desire areas, apply Mod Podge on the roof and sprinkle the fake snow over it. You may want to tap down on the snow to make sure it’s sticking to the Mod Podge.
4. Allow your birdhouses to dry completely before hanging them on your Christmas tree.

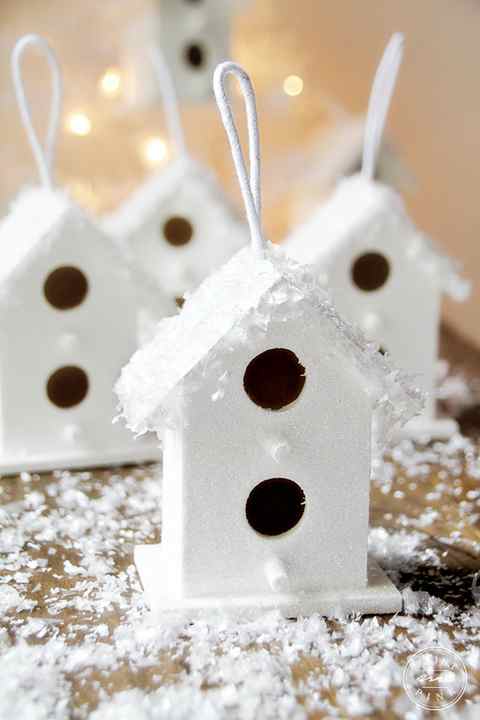
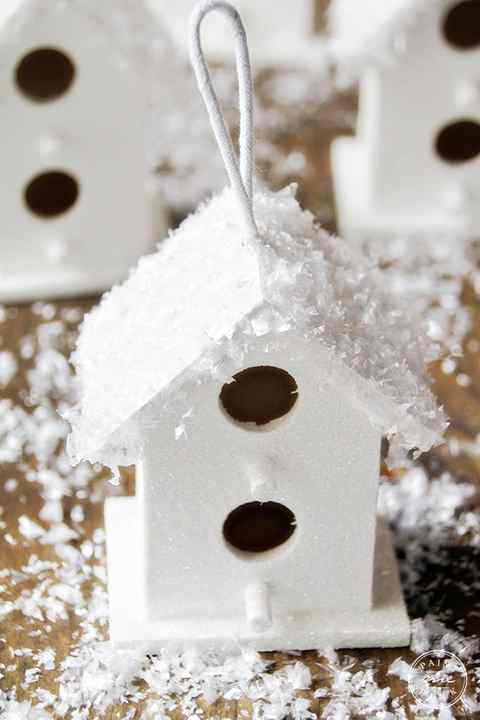
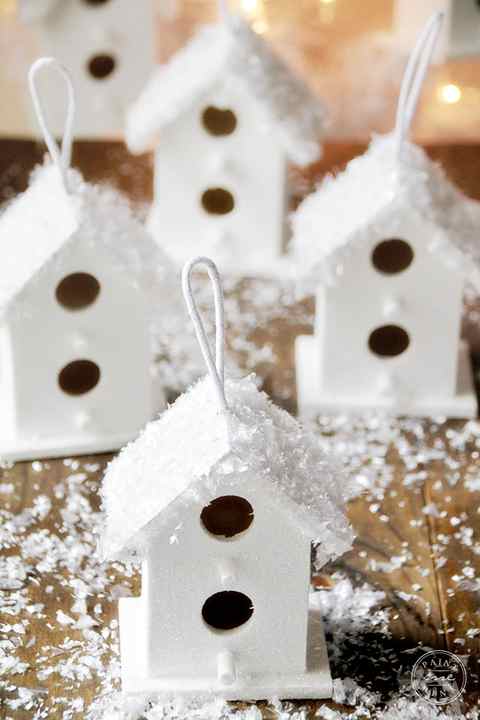

That’s it! Super simple and beautiful.
Share
siaosi
July 21, 2016
I would have to say that these bird houses are pretty incredible. I know that the white is really attractive and will draw in the birds. I am excited to see how they work out. I do have to say I don’t know if the sparkles will help. View Comment
Ann
December 28, 2016
Just viewed this post, I love the birdhouses. Lovely!! I am starting to do mini themed trees, I may look for some mini birdhouses and do same!! View Comment
paintmepink
December 29, 2016
So glad you know that you loved the birdhouses! It’s still one of my favorite DIY’s and we used them again this year on our christmas tree Happy Holidays! View Comment
Elizabeth Murphy
March 4, 2018
Would like to know how to make the snow to look like fluffy white frosting with some subtle sparklers it. View Comment
Maureen Andrews
May 31, 2022
I don’t think birds will be attracted to white birdhouses because I thought birds considered white as danger. Is this true? Please correct me if I’m wrong. View Comment
Leave a Comment Cancel Comment
Christmas Home Tour
Free Christmas Printable Greeting Cards

R e c i p e • Looking for a delicious Thanksgiving recipe? This Cheesy Herb Potato Gratin is thinly layered in an easy homemade cream sauce and baked until tender, golden, and bubbly. It’s potato perfection! . . Head on over to the blog for the full recipe! ➡️ https://www.paint-me-pink.com/cheesy-herb-potato-gratin/ • Make sure you check out my talented friends for more delicious recipes! @tatertotsandjello @eleanorrosehome @midwestlifeandstyle @thisisourbliss @tatertotsandjello @inspirationformoms/ @mysweetsavannah @pink_peppermint_design @roomsforrent INGREDIENTS: •4 tbsp softened unsalted butter divided •6 large russet potatoes peeled •1 1/2 cup heavy cream •1 cup shredded white cheddar cheese •3/4 cup shredded parmesan cheese •3 garlic cloves minced •1/2 cup fresh Italian parsley •1/2 fresh parsley chopped •3 tbsp fresh rosemary finely minced •salt and pepper to taste Happy Cooking!
1 day ago


H a p p y H a l l o w e e n • Wishing you a night of ghostly fun and sweet treats. Swipe ⬅️ to see our last three years in Camp Pendleton, CA. As I was editing the picture, I realized that I forgot to turn on my softbox light while I was taking the pictures. I didn’t get the shadow effect I wanted for the pumpkins to make it cohesive with the other two pictures. Nevertheless it turned out cute and it’s been such a hoot having a house full of Waldos.
1 week ago


T r i c k o r T r e a t • This little guy is all about the treats but his older sister loves a good trick. 1 day left until Halloween Swipe ⬅️ to see last year’s picture Happy Monday!
1 week ago

R e c i p e • Halloween Marshmallows Have you discovered food decorating pens? If you haven’t, you are in for a treat! I’ve been using edible food decorating pens for years, and it’s become one of our traditions to make spooky Halloween marshmallows for our hot chocolate and s’mores! You can draw on any size of marshmallows, and it’s a fun way to get into the Halloween spirit! Enjoy! . •
4 weeks ago

R e c i p e Moon Spell Cookies These crescent moon cookies are soft, buttery, and quite hard to resist. They are the perfect treat to make this Halloween! . • ✨Recipe✨ 2 sticks (8 oz; 230 g) unsalted butter softened 2 cups (240 g) unbleached all purpose flour 1 cup (100 g) Almond Flour ½ cup (60 g) powdered sugar 1 teaspoon kosher salt 1 teaspoon pure vanilla extract Rolling Sugar: 1 cup (120 g) powdered sugar sifted ½ teaspoon ground cinnamon 1. Combine all ingredients in the bowl and mix until the mixture comes together. It will be fairly crumbly and dry at first, but will become smooth as it mixes. 2. Bring the dough together with your hands. Divide in half. Working with one dough half at a time, roll the dough into a roughly 1-inch wide log. 3. Cut dough into equal-sized pieces (roughly 1-inch x 1-inch in size). 4. Roll each piece into a 4-inch log, then shape into a crescent moon. Transfer the shaped cookies to a parchment lined sheet pan. Chill in the refrigerator for 30 minutes. 5. Preheat the oven to 350°F. Bake the cookies for 12-15 minutes, or until the edges are just beginning to turn golden. The bottoms of the cookies should be golden brown, but they will be mostly pale in color. 6. Sifted powdered sugar and cinnamon in a medium bowl. Gently roll the still warm cookies in the powdered sugar mixture. Transfer the cookies to a cooling rack and allow them to cool completely. Once the cookies have cooled completely, use a fine-meshed sieve to dust the cookies with the remaining powdered sugar mixture. Enjoy!
Birdhouse Tree Topper:
You can use it as a tree topper by feeding the top branch(es) into the hole on the bottom of the birdhouse.

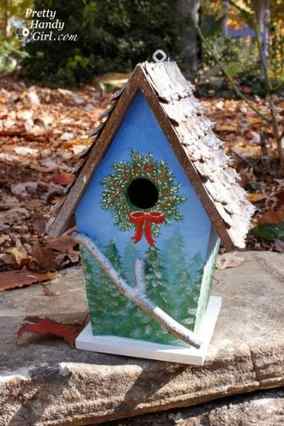
Outdoor Birdhouse:
Add the screw eye hook and hang the birdhouse from a tree in your yard.
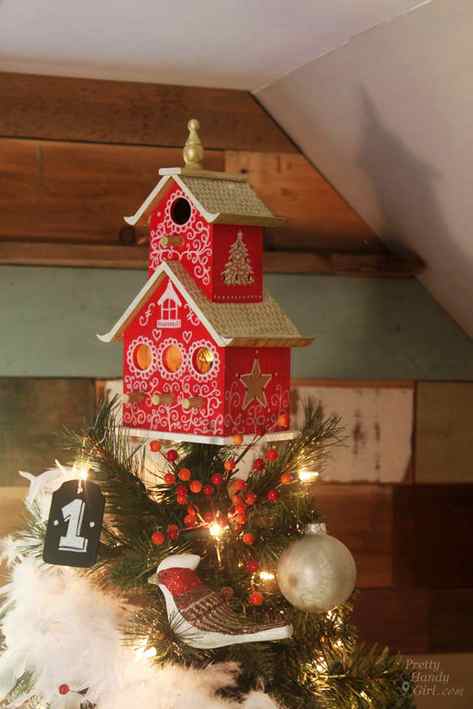
Décor Birdhouse:
If you simply want to display your birdhouse as décor, set a little battery-powered light inside the hole in the bottom and enjoy a homey birdhouse on a shelf.
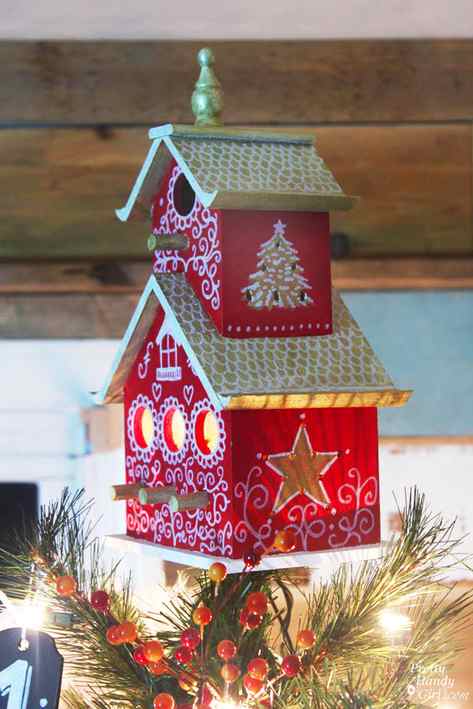
Want to decorate your birdhouse more? You can see how I created this little Christmas painted birdhouse and embellished the roof.
Doodle-painted birdhouses are adorable gifts and very frugal. Make it May is almost over, but stay tuned for one more project!


