Acrylics are great for beginners. They are fairly easy to use, dry quickly and are cheaper to buy than oils or watercolours. A few simple acrylic painting tips will help you get started and enjoy the process of creating.
21 Acrylic Painting Tips for Beginners

If you’re a newbie to acrylic painting, we’ve got some tips that will help you shorten the learning curve. Our artists have pooled their collective experience to share some of their tried-and-true tricks for better acrylic painting. They were once beginners, too, so they understand the struggle when starting out. In this article, you’ll find suggestions, techniques, and explanations that are guaranteed to make you more comfortable at the easel and have you painting acrylic masterpieces in no time!
Get Started Using Acrylics
To get you started, we’ve listed some tips that have been used in a video of an Arteza artist creating a stunning landscape. You can see these tips in action by watching the video and paint along to make your own landscape painting.
- Find a reference. The internet is full of images that you can use as a reference for cool things to paint. Using photo references is also a great way to practice painting landscapes and urban scenes before venturing out to paint in public. Since the reference doesn’t move, you can hone your painting skills easily.
- Use synthetic brushes.Acrylic paint is a medium-bodied paint that will adhere much better on synthetic, bristle brushes than on softer brushes. They are easy to find, as brushes made especially for acrylic painting are clearly labeled.
- Use wide strokes. You’ll cover more areas and be able to create more textures by using wide strokes as opposed to thin ones. For example, you can use wider strokes for painting a background, to fill in the sky, for water, and to add mountains. Save the thinner strokes for small areas and for placing details.
- Paint densely. Don’t skimp on the paint. It’s okay to use large amounts of it and apply it thickly. You may think using less paint or thinned paint will save you money in the long run, but all it does is weaken the piece you’re working on and forces you to create more layers, which can muddy the paint.
- Work with a palette knife to add some texture. It’s fun to switch things up by using a palette knife instead of a brush. Palette knives can add different textures to your artwork by either scraping paint away or adding thick layers.
- Use a thin brush with long bristles for small details. The best brush to use for the smallest details in your painting is a long, thin-bristle brush, also known as a liner brush. Using a thin brush enables you to emphasize the edges of things. You can also add details with a small flat brush.
- Work relatively fast. Acrylic paint is known for its fast drying time, so it’s important to develop a quick painting habit. Once acrylic paint is dry, it’s impossible to reactivate. There are extenders you can purchase that will add moisture to the paint and help extend the drying time.
- Use warm and cold shades to add contrasts. Contrast is the best way to make your paintings visually interesting and to add a realistic look. You can do this by using warm colors (reds, yellows, oranges) next to cool shades (blues, purples, greens).
- Make your painting bright and lively. Don’t be afraid to use bright colors. It’s amazing how dynamic a painting becomes when highlights in white and areas of bold or unexpected color are added.
- Use different techniques. Acrylic is a versatile paint that adapts well to different techniques. You can even paint with your finger to blend and mix the colors smoothly. Experiment and play with the paint—mix new shades, use non-traditional tools, use unpredictable surfaces. These are the things that will make your painting look more diverse and help you develop your unique style.
- Paint over mistakes when the piece is dry. If you’ve made a mistake, no worries. You won’t have to wait long for the paint to dry to easily paint over any stray marks or unwanted colors.
More Acrylic Painting Tips for You!
Here are some more tips we think will be helpful for you to use in your landscape painting or in your future artworks.

12. Keep a variety of brushes on hand. You never know which brush you’ll be using next, so it’s advisable to have brushes in multiple sizes nearby. You can start out with the basics—small, medium, large—and add more sizes and shapes later on, ranging from small to large.
13. Take care of your brushes. Brushes are an important investment in your painting practice. If you want them to last, you’ll need to make sure you clean them well after each use to keep them from becoming dry, rigid, and useless.
14. Use a mist of water to extend drying time. An easy way to avoid having your paint dry too quickly is to mist the paint after you’ve applied it to the palette. Plastic spray bottles work great for this and can be purchased inexpensively.
15. Use thinned paint for undercoatings. The beauty of acrylic paint is that it can be thinned with water to resemble watercolor paint. By doing this, you can quickly add an undercoat of paint to your surface. This is called “toning” the canvas. Underpaintings can enhance your painting as well as act as a way to get you started without the fear of facing a blank or white canvas.
16. What is gesso and why does it make a difference? Acrylic artists commonly use canvas coated in gesso. A white paint mixture, gesso, prevents the paint from absorbing into the canvas and stiffens the fabric to allow the paint to lay on the surface. It also adds a slight texture or “tooth” that holds the paint while allowing it to be pushed around as the artist works. Many artists will add an additional layer of gesso before painting to add more texture to their work.
17. Use your palette for color mixing. To avoid muddying your colors on the canvas or placing a shade you don’t want, always mix your colors on a palette. A palette is also a place for experimenting with color combinations.
18. Some acrylics darken as they dry. You might be surprised to find that the bright color on your palette dried somewhat darker. A good idea is to create swatches of your colors to see which ones dry darker. Just paint a small square of paint on a scrap canvas or piece of paper and wait for it to dry. This will help you anticipate how the color will actually look and you can mix accordingly.
19. Step away from your painting periodically. It’s easy to lose perspective of what you’re painting. That’s why you should step back and take a look at the overall work often. By taking just a few steps back, you’ll immediately see how the colors are working together if angles need adjusting, or your objects are in scale.
20. Practice blending. The quick-drying nature of acrylics can make blending a challenge. But, by practicing blending your colors together, you’ll get the hang of it.
21. Have two water jars handy. To keep the paint you apply to the canvas as pure as possible, keep two jars of water nearby. Use one just for cleaning your brushes and one to dip your brush in when thinning the paint. This is a good way to recycle household jars and save on the cost of purchasing special brush-cleaning basins.
Now you have some tips and tricks to take you from beginner to artist to experienced painter. The more you paint, the more you’ll learn, and the better you’ll get. We hope these techniques will give you the confidence to keep going. If you get stuck you can refer back to this blog or check out one of the many blogs on acrylic painting we provide on our website and YouTube channel. We’d love to hear how it’s going, so leave us a comment in the section below.
Until next time, happy painting!
Acrylic Paint
1. Use professional grade paint , not craft paint, if you can afford it. There are many brands available at various prices.
Professional grade paint has more pigment and will make it easier for you to blend and give better coverage. Most major brands also have decent student-grade paints that work well for beginners.
2. Acrylic paint dries fast . This can be great if you don’t want to wait days for a layer to dry, which you would have to do with oil paint, but it can be a little frustrating when you want to blend.
It’s best to work quickly with acrylics or use an extender designed to slow the drying time.
The fast drying time is also not so great if you happen to spill paint on your clothes. To find out how to get acrylic paint out of clothes this post on how to remove acrylic paint from clothes has a few tips.
4. Acrylic paint generally dries a little darker . The cheaper the paint, the darker it will dry because the paint contains less pigment and more filler.
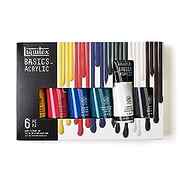
5. Buy basic colors, to begin with . Red, blue, yellow, black, white and an earthy tone like burnt umber are good to start with. You can mix other colors as you need to.
Eventually, you will figure out which colors you use most and you can buy those. There are often starter sets available in student-grade paint such as this one from Liquitex, which is a good place to start.
6. If you are using the cheaper craft-type paints ( because of cost or availability) you can try adding a tiny bit of white to make them more opaque. Cheaper paints have less pigment and are therefore more transparent.
White will lighten the paint so you might consider using a slightly darker paint or paint multiple layers to get the tone you want.
Brushes
7. Clean your brushes with mild soap and water after each painting session. Dried paint is almost impossible to get out of brushes.
Lay your brushes flat to dry to prevent water from getting into the ferrule and loosening the glue. Water will also cause the wood to swell and the lacquer to peel on the handle.
Never leave your brushes sitting in water for long periods of time for this reason.
For more information about cleaning your brushes see my post on The Best Way to Clean Brushes.
8. Store your brushes with the bristles facing up . The bristles can become splayed and bent if they are stored bristles down in a jar. Make sure they are clean and dry and then store them bristles up in a jar or other container.
9. Synthetic brushes are best for acrylic painting . You need a brush that isn’t stiff or too soft.
The brushes don’t need to be expensive but avoid the cheap dollar-store brushes because they frequently shed hair into your paint and the bristles separate after a few uses.
10. Just a few brushes are all you need to begin with . Filbert brushes (flat with an oval top) in a few different sizes are good to start with.
Also, a larger flat wash brush and a fine detail brush are good to have. You can often buy these in sets that are fairly inexpensive but still good for beginners.
You can add to your collection over time and will develop your own preference in brushes.
11. Use a palette knife for mixing paint . These are also inexpensive and easy to use for mixing and painting. ( See my post on How to Use a Palette Knife).
If you don’t have a palette knife you can use a plastic knife or even an old credit card or a craft stick.

More Painting Tips
12. Don’t compare yourself to others . Your art and your art journey are unique to you. It is unfair to yourself to compare your artwork to someone who has been painting for years.
Don’t compare your beginning to someone else’s middle.

13. Sign and date your artwork ….even your first attempts at painting. Signing your painting gives you a sense of ownership and makes you feel like the artist you are.
Dating each piece gives you a reference point so you can look back and see how far your skills have grown over the years.
14. Take pictures of your artwork . Pictures provide a visual record for yourself and can be used for social media posts, online portfolios, and web pages.
15. Make notes as you paint for future reference . Jot down how you mixed colors, what composition you liked, and where you got your reference photo or something you learned or observed while you painted. You can refer back to these notes in future painting sessions.

16. If you make mistakes and want to paint over them, you can usually cover most paintings with a coat or two of gesso. (See my post on How To Gesso A Canvas). Give the gesso a light sanding and you can start over again.
17. Keep practicing . Learning to paint is a long process and the more you paint the better you get. Try to paint something every day, even if it is only blocks of color or random shapes.
The more you practice the more comfortable you will become with the brush and paint.
18. Step back from your painting frequently . You get a better perspective from a couple of feet away. You can better see the overall composition and how well the colors are working together from a distance.

19. Keep a spray bottle of water handy to mist your paints and keep them from drying out. You can also mist your painting surface to keep your paints wetter for blending. Try to find a bottle with a fine mist sprayer to avoid large water drops. Find out more about palettes to keep your paint wet in my post on palettes.

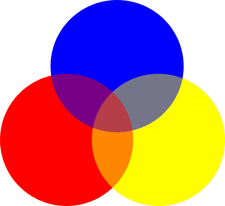
24. Purchase a color wheel to help you mix colors and guide you in deciding which colors you should use in your painting.
25. Don’t be afraid to ask questions . Most paint manufacturers are happy to help if you email them your question.
They also usually have many valuable resources such as fact sheets and how-to videos on their sites. Below are links to a few.

I hope you found some of these tips useful in your painting. If you have any questions I would love to hear from you.
We also have a private Facebook group, Trembeling Art Creative Corner, where you can post your work, ask questions and interact with artists of all levels. Everyone interested in art is welcome.
Acrylic painting techniques
For each technique, I’ll run through the supplies you need and how to try the technique yourself.
Create texture with the impasto acrylic painting technique

Impasto is an incredibly fun technique that artists use to create vibrant works with depth and texture.
What supplies do you need for the impasto technique using acrylic paint?
To create texture with acrylic paint, you don’t need too many extra supplies. All you really need is heavy body paint and stiff brushes. You won’t need to add any water to the paint mix.
Golden’s Heavy Body paint is high quality, highly pigmented, has a thick texture and retains brush strokes on the canvas.
When choosing a brush for the impasto technique, choose one that is stiff but springy. These Princeton Catalyst brushes emulate the stiff properties of hog hair, making it feel easy to move thick paint.
To add to the body of paint, or make it more thick and three dimensional in appearance, look at the Liquitex Modelling Paste. Apply thick paint with a palette knife, stiff brush or a silicone catalyst wedge.
How to paint with the impasto technique

Artists who want to seamlessly blend colours onto their canvas usually gravitate towards oil paint due to its slow drying nature. However, it’s possible to increase the open working time of acrylic paint.
Use Golden Open Acrylic paints, as these dry at the same rate as oil paints (around 1-2 days). If you already have a set of acrylic paints, then you could extend their open working time with a medium. Any of the Golden Open Mediums will make paint dry slower.
Softer brushes are best for blending paint. If you use soft body acrylic paint, get an extra soft brush to blend colours together. The Da Vinci Casaneo in the square shape would work perfectly for this. A large slightly springier brush like the Isacryl brush in the flat or filbert shape would blend slightly thicker paint better.
For a more in depth look at how to blend acrylics and step by step guides using two different blending methods, take a look at our blending acrylic paint tutorial.
Alla Prima (wet on wet) with acrylic paint

Alla prima is the technique of applying layers of paint on top of wet layers. The painting, or section of the painting should be finished before the first application of paint dries.
It’s a fast, fun and spontaneous way of painting, that can yield gestural and textural results. Colours swirl together, appearing loose and painterly.
A drawback of acrylic paint that makes it difficult to use the alla prima technique is its fast drying nature. If you want to try painting wet on wet, you will need a slow drying medium, or to use Golden Open Acrylics. The slower the paint dries, the better. As it will give you longer to complete the painting. I also recommend using stiff brushes, especially in later stages of the painting as you will have to increase the thickness of paint in consecutive layers.
Start by blocking in colours, or by creating an underdrawing. Then layer paint onto the canvas in the colours that you see in your reference. Gradually increase the thickness of the paint as you apply more layers. The thickest and lightest highlights should be applied last.
If you make a mistake, scrape the paint away with a palette knife. Paint can be applied to your surface with a stiff brush, a palette knife or catalyst wedge.
Check out our alla prima painting guide to learn this technique in more detail.
Acrylic painting in layers
This is an approach to acrylic painting that goes hand in hand with blocking in, underpainting and glazing.
Acrylic paint dries fast, so it’s possible to create works with hard edges with relative speed. Increase the open working time of paint to create blended layers with a fluid retarder. By combining these techniques, creating layered pieces with a variety of hard and blended edges, you can create realistic looking artworks.
Blocking in acrylic painting technique


The only supplies you need for this technique are tube paint and a medium stiff brush. You can optionally thin your tube acrylic paint with water to make it runny in texture.
Blocking in an acrylic painting forms the first stage of the painting process. The purpose of this technique is to cover the canvas, so the white of the gesso ground isn’t visible. Block in basic shapes of colours you see in your reference.
For example, if you’re painting a mountain scene, a distant mountain may appear broadly blue-grey in tone with light grey highlights where snow is reflecting light. For the blocking in stage, you would paint the blue-grey colours. Then wait for it to dry and layer the lighter highlights on tops.
To be successful at using this technique, you’ll have to think of your painting in layers. You’ll have to see these layers in your painting reference.
For a more detailed tutorial, check out our blocking in technique guide.
Underpainting

The underpainting technique can be used with oil and acrylic paint.
The purpose of this technique is to create a monochromatic layer. Spread a layer of paint thinned with water evenly over the surface. This type of underpainting method is called a toned ground or imprimatura. It works well with transparent earth colours like burnt umber or burnt sienna. It functions to create a mid toned ground, which helps artists establish value relationships between colours more easily.
Another underpainting method is using a colour like burnt umber and titanium white to create a tonal underpainting. Establish the values, form and composition of a piece. Colour layers are then applied on top in glazes or opaque layers.
To learn more about this technique, read our underpainting tutorial. It’s aimed at oil painters but all the techniques can be applied to acrylic painting.
Glazing acrylic paint

Liquitex splatter brushes are made for this technique! The long bristles enable you to create unique splatter patterns.
To create splatter effects on the canvas, you’ll need a stiff brush with long bristles (like the Liquitex brush) and soft body acrylic paint. Wear some gloves and cover your work surface, as it can get messy. Pull the bristles back with your fingers, then release onto your surface. Or you could flick the brush itself. Use this technique to create abstract pieces, stars, or ocean foam.
Jackson Pollock would use a number of different tools and mark making techniques such as paint splatter in his abstract expressionist pieces.
Sgraffito

Sgraffito is the technique of scratching into wet paint so that colours are revealed from layers beneath. Create patterns in the wet paint by scratching with the end of a brush or a palette knife.
Use this technique in portraiture by creating a toned underpainting in a transparent earth colour like burnt umber and scratch off highlights in the hair. Rembrandt used this technique to reveal highlights on strands of hair in his self portrait.
Create three dimensional works
By incorporating modelling paste in the paint mixture, you can create sculptural, three dimensional works. It improves the adhesion of paint layers, so it can also be applied on its own before acrylic paint is layered onto the canvas. One way of using the medium is to create volume and structure on the canvas, then paint on top of it.
Add texture to the paint with dry additives
Add dry mediums such as marble dust or mica flakes to acrylic paint gel medium or to the paint itself. Dry mediums all have their own individual properties. Mica flakes will provide opalescent and iridescent effects. Add mica flakes to transparent mediums like acrylic paint gel for the best effects. Equally, mica flakes can be sprinkled on top of a wet paint film to make a painting sparkle.
Dabbing with a sponge
Using a sponge to apply paint can yield some varied effects. If you want to create a texture appearance, dab a dry sponge loaded with thick paint onto your canvas. You will create peaks of paint with broken almost grainy appearing texture. If you wet the sponge and use fluid paint, you can create a soft blended appearance.
Stippling
Stippling is the art of dotting paint onto the canvas. This is a technique commonly used with pencil medium. Get a round brush with short hair, an old worn down brush works well with this technique. Use the dotting action, with dots closer together in areas you want to appear shaded.
Mix colours on the canvas
Mix colours directly on the canvas instead of on the palette. Monet was famed for doing this. This technique can create vibrant and varied areas of colour. Colours are mixed together and therefore the pigments appear purer than if they were combined. Use a palette knife on the canvas for the best mixing results.
Scrape paint
Use this technique in abstract painting. Layer on colour, then use a Catalyst Wedge tool to remove paint from the surface. You’ll be left with a thin, mixed layer of transparent paint. Play around with this technique and colours until you achieve the desired effect.
Acrylic painting techniques for beginners
The impasto technique is a perfect for beginners to experiment with. It’s fun, and feels immediate and spontaneous. Thick texture adds a new dimension to artwork. For beginners, I would recommend sketching out your painting first so you know how the different elements are going to fit together. Then mix all your colours before you start applying paint. Get a stay wet palette to keep colours wet for longer.
All other techniques on this list would be suitable for beginners to get started with, however glazing and alla prima may take some practice to master. If you’re interested in learning how to acrylic paint from scratch, check out our list of the best acrylic painting tutorials.
Acrylic painting techniques: Pin it!
If you’ve found anything on this site especially useful, you can make a donation to me through PayPal. I take a lot of time to research and write each topic, making sure each tutorial is as detailed as possible and I make all my content freely available. Any small donation (even the price of a cup of coffee!) can help me to cover the running costs of the site. Any help from my readers is much appreciated :).
Follow the link in the button below to support this site.


