Daisies make great filler flowers when done with a small brush. Add them for a spark of white to a more colorful flower painting. By adding white it can make your colorful flowers pop.
How to paint a colourful daisy flower in watercolour
If you’re anything like me, every time you spot a beautiful flower, you feel compelled to capture it on paper.
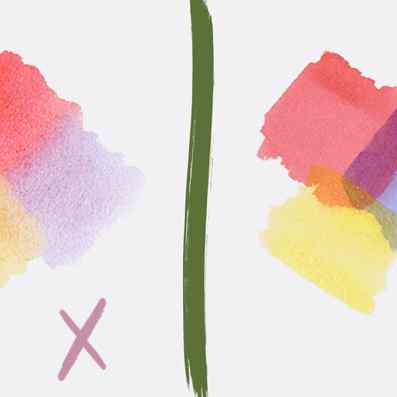
So often, we feel inspired to paint subjects with bold, vivid colours. But when it comes to actually painting them, their attractive hues can sometimes work against us.
We can become blinded by the beauty of their vibrancy, and stop paying attention to the tonal changes. This can result in disappointment from a painting that doesn’t look 3D enough.
In this mini-class, I’m sharing with you the process I followed to paint this colourful daisy flower.
I show you how I used bright, bold hues to achieve vibrancy, but also worked to create a 3D effect to make the flower pop off the paper.
I hope this mini-class has inspired you to paint your own colourful daisy flower, and that it’s given you the confidence to paint more flowers in vibrant colours.
If you give this African Daisy painting a go, I’d love to hear how you get on, so let me know in the comments below. And do also drop me a message if you enjoyed the video. I love reading them!

Browse more blog posts


So you want to be a painter? Schedule it!

Step by Step Painting a Daisy lesson
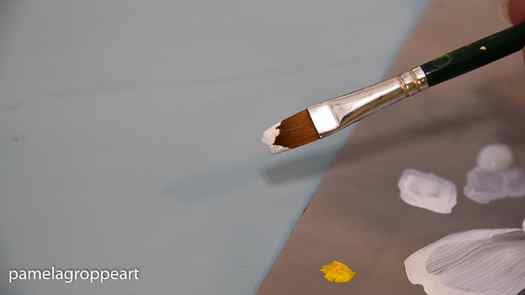
Double load your brush in white and light grey. Only just a little bit gray, you should have mostly white on your brush.
The gray just adds some depth and striations that give the petals some interest, you don’t even have to add it if you do not wish to.
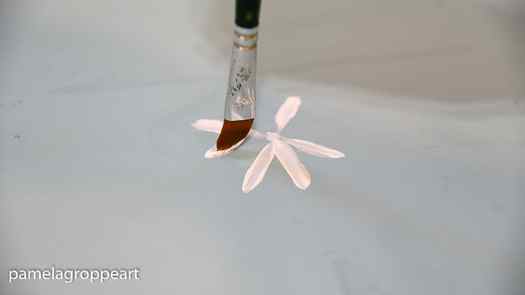
Make a dot on your surface to give you a center point. It makes it easier to have a center point to pull to. Lead with the white.
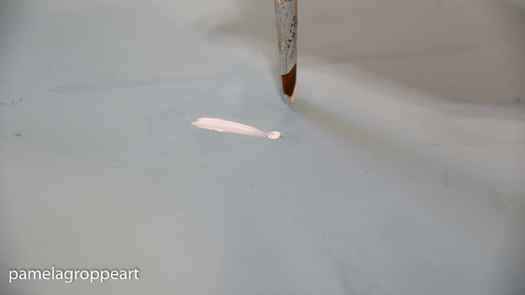
You can draw a light circle to keep your petals about the same size but I just fly with it much of the time and let them be wonky.
Note: The first video in this post is a quick overview. To see real-time video with step-by-step instructions please see the end of this post.
Paint Daisy Petals
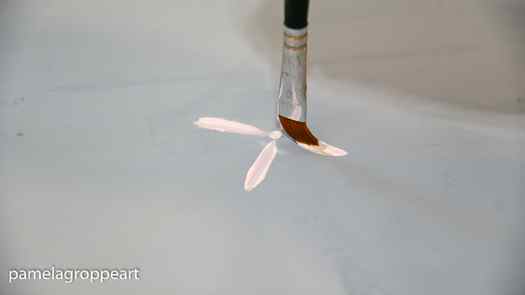
3. Press on the chisel edge of your brush, pull towards the center, adjusting pressure to how wide you wish the petal to be, and lift the brush to a chisel edge as you get closer to the center to let the stroke narrow.
4. Add strokes around the center dot, some can be a bit curved to add movement. You can make the backstroke shorter and the front strokes longer to emulate depth. But I demonstrate as if you are looking straight down on the flower.
Keep adding petals until you have filled in to your satisfaction. Less is more. You can always add petals but taking away too many is more difficult.
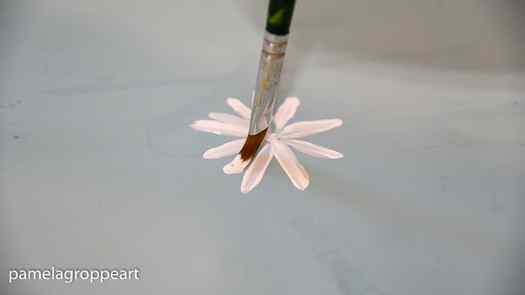
Once you have completed the circle to your satisfaction then we will add the center..
Paint a Simple Daisy Center
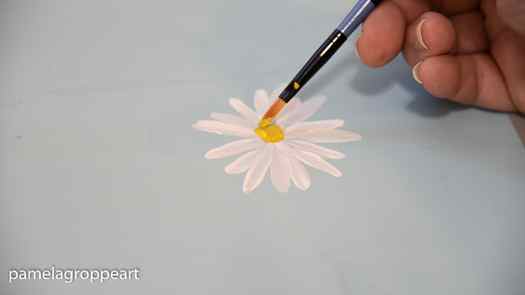
5. Double load your scruffy brush in the yellow and gold and pounce on the center, or you can use a small flat brush and paint on a round center. I like the texture that the scruffy brush adds. (I show you both ways in the video below)
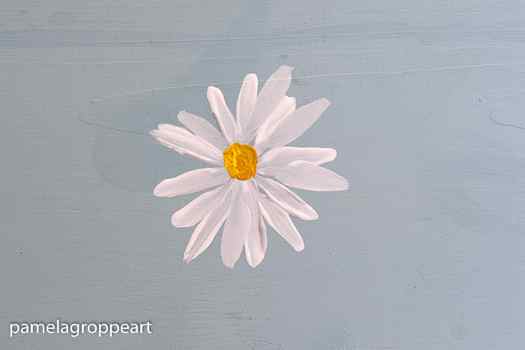
And there you have it, a simple but lovely Daisy.
To view the full-length video and get the PDF download of this post just sign up below. don’t worry, it’s free!
Use a smaller brush and make smaller daisies as I did in this post: Paint Lavender and Daisies
Now that you know how to paint a simple daisy, get creative.
Supply List
- Surface to paint on of your choice.
- Paint~
- Wicker White
- Gray (or you can mix a small amount of black into the white to mix your own)
- Daffodil Yellow
- Yellow Ochre
- #10 or #12 flat brush (you can also use a round brush)
- 1 small scruffy brush (included in the set linked above)
- Brush Caddy
Real-time step-by-step video for you.

More painting tutorials you may enjoy!

Please enjoy and share!
Can I do this Flower A Different Color?
YES! If you want to do this daisy a different color, choose a light and a dark version of that color. Example: for a pink flower, use a light pink and a dark pink (medium magenta and light portrait pink). For a purple, use a light purple and a dark purple (dioxazine purple and brilliant purple).
The brushes I used for this painting are:

A scruffy brush has natural bristles that are rough and scratchy. They are great for creating the texture in the center fo the flower.

Traceables:

I drew this flower by tracing one petal around a circle. You can print out the petal and do the same or print out the entire daisy drawing and trace that onto your canvas.

Video:
1. Paint a gray background
To do this background, I used a 3/4 Wash Brush and the colors: neutral gray value 5 & titanium white.

Double load your brush in both the gray and the white. Then paint expressive strokes that blend on the canvas.

These strokes are sort of long and go diagonally in all directions. Let the gray and white blend together!

Don’t worry about it all looking one solid color, the strokes should show and you will get multiple shades of gray.

2. Draw or transfer the daisy to the canvas
You can use my traceable, my petal traceable or hand draw this daisy.

First use a compass or trace a circle for the center part of the flower. The circle is about 2” in diameter. If you are using a compass, set it to a 1” radius.

Then use the petal and trace it anywhere on the circle.

Trace another petal opposite of it.

Continue to trace more petals paying close attention to the spacing. You want to overlap some petals so when we paint it in, there will be some depth in this painting.

After tracing and overlapping some petals, erase lines as needed.

3. Paint each petal with light blue violet and ultramarine blue
To do these petals, I did a double load blending technique. Use a 12 bright brush and load it in light blue violet and dip the corner in ultramarine.


Paint the petals letting the light and darker blue blend but you don’t have to make the petal turn a solid color.

When you go on to the next petal, pay attention if it is overlapping or not. If it is overlapping, make it slightly lighter or darker. I made the petals in the back slightly darker.

If you want your paint slightly darker, simply load your brush in more ultramarine blue and less light blue violet (and visa versa for lighter petals).

Tip: you don’t need to rinse your brush as you paint each petal. Wipe it off on a paper towel when your brush gets overloaded with paint.


4. Add a little bit of “flower texture” with titanium white mixed with light blue violet
To do this flower texture, wipe your brush off but do not rinse. You will still have blue residue on your brush.


Then load it in white and drag it out on your palette until you get a very light blue.

Then lightly paint strokes of this light blue on each of the petals. You will see these light strokes on the petal that stand out from the previous blue you painted but do not cover the blue solid.


5. Use a round brush to paint the base of the petals with ultramarine blue
Then use a 4 round brush to paint ultramarine blue lines at the base of each of the petals. This will create a dark contrasted area in the center of the flower.


6. Paint the center of the flower mars black
Use your round brush to paint the circle mars black. Paint it solid.

7. Wait for the black to dry then use a scruffy brush to paint the white texture over the black
Before you can continue, either dry the painting or wait for it to dry.

Then use a scruffy brush to dab titanium white dots all over the black circle. Make it a little more concentrated in the center.


8. Use a round brush to paint little yellow dots at the edge of the black circle.
Finally, use a round brush and primary yellow to paint yellow dots all around the black circle.


Keep painting dots until you get a relatively thick ring around the black circle.


