- Printable tutorial – step by step with photos of each stage of the process
- Video lesson – 34 minute video lesson
- Live Zoom lessons – coming soon! Check here for updates.
Watercolor Techniques
This section, contains information about watercolor techniques used in creating watercolor (watercolour) art.
Watercolor painting for beginners can be quite daunting but I have found that almost all difficulties artists’ find when painting with watercolor resolve by fixing basic techniques.
These watercolor techniques should be useful for both beginner watercolor artists and more experienced artists who would like to brush up on their watercolor painting basics and hence improve their artwork.
The material that will appear in this section over the coming weeks is what I teach my students during their first six to eight weeks of learning how to paint with watercolors.
 Watercolor techniques
Simple watercolor painting for beginners. A beach scene painting with just two watercolors. Step by step guide covering basic topics such as paintings skies and clouds, sand, the sea, people and birds.
How to paint water. Advice on how to paint water by ensuring you concentrate on  creating reflections, transparency and  fluidity.
How to create the impression of fog and mist. This demonstration of an Australian alpine scene covers the topic of how to paint mist and fog with watercolor paint.
Simple watercolor painting of boats and water. Painting row boats, sail boats, birds and sparkle on the sea.
Dry Brush Technique for watercolor painting. Describes how to create different dry brush effects as we as discusses their importance in a painting.
Pen, Ink, and Wash video demonstration. Available as free sped up version on YouTube or as a paid download – 45 min video.
MY PATREON MEMBERSHIP
Subscribe to my Patreon Membership for a small monthly fee. Cancel at any time.
Available on Amazon
Mastering Watercolors, available from Amazon paperback and eBook.
Available on Amazon
My second book Watercolors, Step-By-Step, More step by step demonstrations.
Processing…
Success! You’re on the list.
Whoops! There was an error and we couldn’t process your subscription. Please reload the page and try again.
Paper is Important
Not all paper is suitable for watercolor. Glossy paper, for example, is hard to paint on because it’s not very absorbent. Computer paper doesn’t work too well, either. The best paper for watercolor painting is thick, porous paper. The heavier it is, the better it absorbs water. When just starting out, you can use whatever you want. But, when you want control over the paint, use paper that soaks the pigment right up.
One of the most frustrating things for first-timers is that watercolor makes the paper buckle as it dries. Essentially, the water soaks into the surface and creates all kinds of wrinkles in the paper. In order to avoid this effect, you can stretch the paper over a panel (like you would with a canvas). If you don’t want to do that, you can tape it down to a piece of wood or cardboard. Make sure the paper is as flat as possible when you mount it so that it has very little room to warp as you’re painting.
Sketch Out Your Composition
Most expert watercolorists make a preliminary drawing before they get to work. They use a pencil to sketch out what’s in front of them on the paper, and then paint over that drawing. In order to avoid having pencil lines in your painting, you need to sketch very lightly. Otherwise, the pencil will be visible through the paint. If you’re going for a more expressive aesthetic, the pencil lines aren’t always a bad thing.
One reason why we love watercolors is that the pigments bleed over into one another. This allows for easy shading and blending. When two similar colors blend into each other, the results can be dazzling. However, if two mismatched colors happen to mix, the results might not look so great. Early on, use a limited palette. This will allow you to test out the material and get used to the way things mix with each other. Once you start to gain control over the paint, you can move on to more complex color schemes.
Layer, Layer, Layer
Watercolor is much different than acrylic and oil painting. You can’t really glob on thick layers of watercolor all at once. The masters of the medium create their works by painting very thin layers on top of one another. Some of them allow each layer to dry before adding the next. Others simply paint wet-on-wet. Whichever method you choose, always paint the lightest layers first. Gradually add darker layers. Remember, you can always cover up a light color with a darker one but you can’t cover a dark color with a lighter one.
It’s easy to limit yourself to light, washy colors. But adding darker colors on top will make the lighter tones really pop. “Value” is the term we use to describe the range of tones in a painting. The value of any painting can make or break the composition. So, it might be tempting to use only a few shades of blue. However, the wider the range, the more powerful the painting will be.
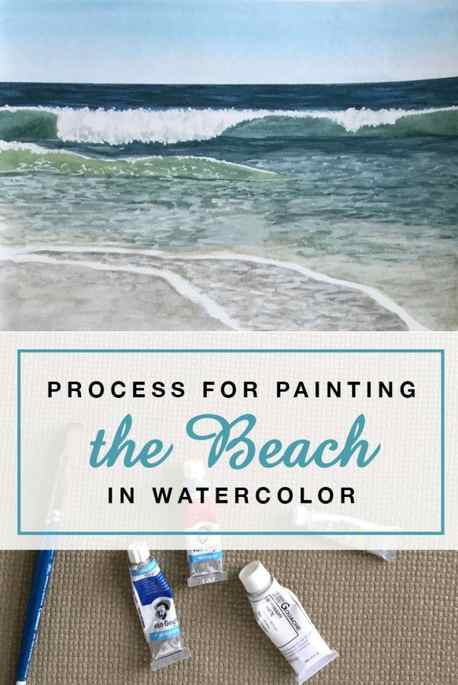
Process for painting watercolor seascapes
Here is a summary of my process. Keep reading for links to more in depth resources.

- Mix seascape colors – I mix blues, greens, and browns from ultramarine blue, cadmium yellow, and cadmium red.
- Mark the horizon line. I use painter’s tape to achieve a straight horizon line.
- Paint the ocean water closest to the horizon darker and bluer.
- Paint the water in the cresting wave lighter and greener.
- Paint the shallow water near shore brown.
- Paint the sand. The sand is darkest closer to the ocean where it is wetter.
- Paint the crashing waves with white gouache.
- Paint the foam with white gouache and a flat brush. Horizontal lines help this area appear flat.
- Add shadows to the breaking wave.
- Paint the sky as a blue fade that is lighter closest to horizon.
Learn more about painting watercolor seascapes:
I share my step by step process for painting watercolor seascapes in the following tutorials. Choose the format that works best for you:
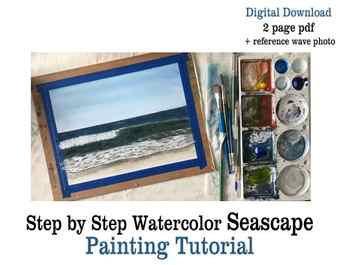
- Printable tutorial – step by step with photos of each stage of the process
- Video lesson – 34 minute video lesson
- Live Zoom lessons – coming soon! Check here for updates.
For a steady stream of watercolor tips and tricks…
The Beginner Watercolor Exploration Guide is for you! And it includes the Watercolor Seascape Painting Tutorial!
- Learn the fundamentals.
- Practice with exercises & projects.
- Discover a love of watercolor!
This post contains affiliate links to products I use and recommend. I earn a small commission whenever you buy using these links, at no additional cost to you. Thank you for supporting my blog!


