Add as many palm leaves to your tree as you desire, I usually do five to six leaves.
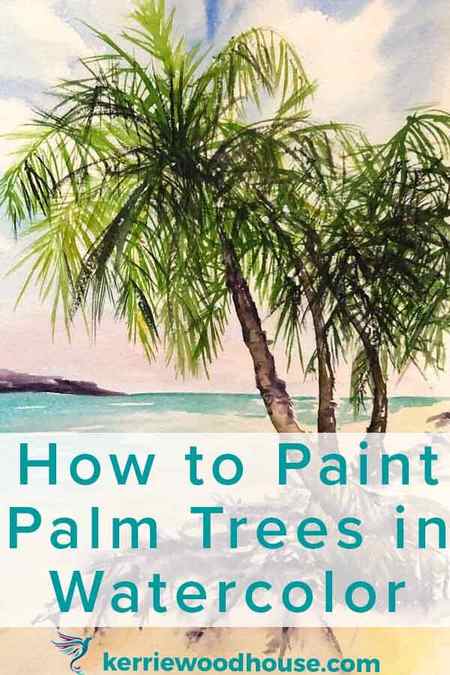
Painting Palm Trees in Watercolor (7 Helpful Tips )
Are you considering painting palm trees in watercolor?
Here are 7 helpful tips to make the painting easy.

Palm trees are an ideal subject for a watercolor painting in many ways, especially if you take a loose approach.
So fitting, don’t you think?
I mean, what says calm, relaxed me-time more than a laid back tropical vibe and a little creative expression?
Let’s get your painting off to a breezy start (see what I did there ) with 7 tips on how to paint palm trees in watercolor.
Oh, and would a youtube video demonstration on watercolor palm trees be helpful?
I’ll include one or two of those too.
How to Paint Palm Trees In Watercolor
I always maintain that all you really need is one big round watercolor brush that comes to a good point to paint just about anything. This is definitely true for painting palm trees.
To paint the palm tree leaves you need to make a shape that’s width tapers off. Fatter at the top and narrowing to a point at the tip. Your round brush can do that with a little practice at varying the pressure.
Press down and you make a wide mark, gradually release that pressure on your brushstroke and the mark becomes increasingly slender.
If you want to mix it up a little, you can also try a dagger brush. The brush tip is flat and shaped like a dagger – hence the name. This means you can get a variety of marks out of this brush by rotating the brush.
With the brush flat to the page you can make a wider mark, but using only the tip will get a very fine mark – almost like a rigger brush would make.
Whichever brush you choose, the flexibility is important. This comes from bristle length. Both a large round brush and a dagger tend to have long bristles. The play in the bristles means that you can get a loose expressive gestural mark – perfect for painting palm trees in watercolor.
2 Study the Formation of The Palm Tree Before You Start Painting
If you want to approach the watercolor palm tree painting in a loose fashion (and I really think that’s best!) then I think spending a few moments study the way the palm tree leaves are formed is very wise.
I don’t recommend a detailed drawing under your painting. All I think you need is to roughly mark in a few of the central ribs on each palm tree leaf.
There is no need to copy every exact detail of a reference photo (or real life palm tree). All you really need is to see that the central ribs of each palm tree leaf spirals out from the top of the trunk in a graceful arch.
So all you really need from you pencil drawing is to identify the approximate length of each leaf and get a rough idea of their placement around the top of the trunk in your painting.
Would you prefer to paint a palm tree in real time with me guiding you every step of the way?
We can do that too. ⬇️
Step 2: Step 2: Preparation
Put you paints onto your paper plate (or other surface to mix your paints), you may need to add a small amount of water to your paints to thin them out a bit. Decide how tall and how big you want your palm tree to be and how long you want your palm leaves to be.
Add Tip Ask Question Comment Download
Step 3: Step 3: Sketch
Sketch out the rough outline of the area of the palm tree in pencil or something that can be erased or easily painted over. this is only to get an idea of the size, shape and placement of the palm leaves.
Add Tip Ask Question Comment Download
Step 4: Step 4: Choose Colors
Choose all of the colors you want for your Palm tree (The trunk, the Palm Leaves and coconuts if desired) Trunk- Earth brown, with a misty beige highlights. Palm Fronds- forest green with leave green highlights. Coconuts mix a small amount of forest green and earth brown, then highlight with misty Beige. You don’t have to use these colors, they were just the ones I choose to use. Feel free to use any colors you would like.
Add Tip Ask Question Comment Download
Steps to Making Palm Tree Art
In this demonstration, I am using one of my favorite mediums, gouache . There are so many reasons I love gouache. But the number one reason is that with this paint, I get the best of both watercolors and acrylics. Gouache is a watercolor paint that has chalk or other white pigment added to make it less transparent than standard watercolors but reacts the same way. So I can use it just as I would with watercolor paint. By thinning it with water, I can use it on wet or dry paper and create beautiful translucent layers. On the other hand, that extra opaqueness gives me the ability to use it like I would my acrylics for thicker layers and for covering one color over another.
If you haven’t given gouache a try, I highly recommend it. For this palm tree example, I used Arteza Premium Gouache Paint. It has a creamy texture in the colors I want. I prefer the set of 60 tubes, which gives me more than enough color choices right at my fingertips.

Step 1
First, I draw a circle. I purposely do not use a compass, because I want this circle to be a little uneven and organic. I’m going to use it to place the palm leaves, and in life, they aren’t symmetrical.

Step 2
I put a point in the circle’s center and draw two lines down from that point. The lines should slightly diverge at the bottom. This is the tree’s trunk.

Step 3
To draw the palm fronds, I place curved lines from the center point outward. These lines will be the center rib of each frond. I connect some of these lines with others as well as place a few by themselves, outside the center.

Step 4
Next, I add an outline around each rib line to make the shape of each leaf. I try to make each one a little different since real ones aren’t the same. I add little round coconuts and a few shadows to give the leaves depth.

Step 5
Now that the drawing is complete, I erase the initial reference lines to prepare the sketch for painting.

Step 6
Have you ever looked closely at a palm tree? We tend to think all the leaves are green, but there are some that are yellowish and brown as well as different shades of green. To get that realism, I start by adding individual leaves with A113 Ocher to the ends of some of the branches. The direction of the leaves starts from the center to the branch’s end. I also use this color to paint the coconuts and some stems.

Step 7
Palm fronds are made of many separate leaves, so it’s important to paint them that way to get the authentic look I want. The main color is 142 Olive Green. I use that color to fill all the branches with leaves. As you can see, I use strokes in the direction each leaf takes.

Step 8
To show the leaves in shadow, I use 158 Deep Green for some of them. I give special attention to the tree’s center where there would be a lot of shadows.

Step 9
Now I turn my attention to the trunk. Using A108 Burnt Umber, I paint the trunk. I also use this color to paint the beginning growth of branches near the palm’s center and to make the shadows around the coconuts. It’s really starting to come alive!

Step 10
It’s important to decide where the light is shining on the tree. Here, I decide the light is shining on the left side, so it’s important for me to add highlights in a lighter shade to that side of the tree. To do this I mix together A108 Burnt Umber and A113 Ocher and paint the trunk’s left side as well as some of the leaves, where I believe the sun would be shining on them.

Step 11
Some parts of the palm would have touches of bright sunlight so I use A101 Titanium White to add a touch of the sun’s glare to the coconuts and twigs. This is a good color to also add some texture to the tree.
Congratulations! You’ve just drawn and painted a palm tree with gouache. It wasn’t as hard as you thought, right? Now, you’re ready to create beautiful tropical paradises of your own.
Recommendations
- The palm tree has unique characteristics, such as how the leaves grow and how the branches are arranged. I recommend studying actual palm trees or images of them on the internet to get a good idea of exactly how they grow.
- You may need to adjust your colors, as gouache has a tendency to dry lighter than it appears on the palette.
- Don’t be afraid to try new colors or where you place your strokes. Because gouache is so opaque, it’s easy to cover mistakes or to change your mind.
- Use a thin brush to paint the most realistic leaves.
I hope you’ve been inspired to use these lush and interesting trees in your next landscape and I would love for you to share with me in the comments about how you create palm trees.
Share It
6 comments
Hey Juliette! We’re so glad to hear you’ve enjoyed this blog so much! Feel free to subscribe to our blogs for more tricks, tips, tutorials, and how-to’s! Here’s a link to some other gouache technique blogs. I hope this helps! In the meantime, we’ll be sure to pass your suggestions along and we’re only a brush stroke away if you need anything. 🙂
8 Videos on How To Paint with Gouache: https://arteza.com/blog/8-videos-on-how-to-paint-with-gouache
Painting with Gouache Techniques: https://arteza.com/blog/painting-with-gouache-techniques
Arteza April 28, 2022
Hey !
Honnestly i love this tutorial ! I will probably do it again with differents colors. But i have one question, have you planned to publish another tutorial on “how to paint texture with gouache” ? Like sand, water, rock or basic stuff like that. It would be really cool ! 😀
Juliette April 28, 2022
Hey Brenna, we’re happy to hear you tried this one out and loved it!
Arteza April 28, 2022
I really enjoyed painting this as well as the steps! Thanks!
Brenna April 28, 2022
It’s our pleasure, Vickie! So thrilled that we could help!


