Involve the kids in a fun DIY canvas project on a rainy day or Saturday morning. Pull out a range of colored paints to form patterns of circles, stripes, and polka dots.
Handlettered Canvas quote – a simple wall decor project
A simple DIY project to make a cheerful and motivational Handlettered Canvas quote wall frame. Few paints, a canvas panel and you have a beautiful wall art to keep you inspired and motivated all day long.
Been such a long time right? I knoweven I really missed blogging. I did tell you right that Grace has started going to Pre-KG? Our lives are so messed up right now because I have to now wake up early to get her ready for school which means no midnight craftings So now you know what I have been upto! Hardly any crafting but loads of calligraphy as it takes just 30 minuted every evening. Are you interested in calligraphy? I would love to give insights on everything I know so far about calligraphy. Well coming to todays post, a little calligraphy is involved but a really easy one. All you need is a canvas, a little acrylic paint and selected quote to make these simple Handlettered Canvas quote wall panels.
Also read : DIY Framed quotes as wall decor
Materials required for making Handlettered Canvas quote :
- Canvas board
- alcohol color splash ( from itsybitsy) or acrylic colors
- Acrylic paint in black for lettering
- varnish/fixative spray
First of all decide which wall do you want to hand up the Handlettered Canvas quote on. Based on the area avaiable you should be able to choose the canvas size and depending on the themse of the room, decide your background shade. Next thing to choose would be the quote you want to see everyday – could be just single words like joy, smile, love etc or could be motivational quotes. You can look up on google for hand-lettered quotes to get a list of simple 5-6 lettered motivational/happy quotes from which you can choose the ones you like to see everyday. I finalized on making a canvas with ” Make your own kind of music”.
I took a canvas board from Monte Marte available at Itsy Bitsy – they are pre-stretched and pre-primed boards but have lesser thickness, somewhat like a mountboard. Camlin also has lot of stretched canvas panels that can be bought on amazon.
First I chose a layout to write the quote on my canvas by practicing on a blank paper. Once that was decided, I tried a few combination of shades from Itsybitsy alcohol gold splashes to use as background. These alcohol splashes come in small bottles with spray head and gives very vibrant colors with a gentle sheen of gold. In case you are unable to get these, you can use normal acrylic paints and either brush them or sponge them onto the canvas.
I am continuing the tutorial with alcohol splashes since I used them and also giving a little insight into how to work with them. I loved the color combination of Frosted Pool and Purple Haze shades but since I was totally smitten by the pretty flowers Pooja had used in her home sweet home canvas project, I decided to go for that combination!
I sprayed a combination of Golden Mocha and Wild Rose over the entire canvas. If you want to know more about the alcohol gold splash sprays, do read my previous post with introduction on them.
Since the canvas this time was a lot bigger, I found a new method for evenly spreading the spray. Instead of directing the spray on the canvas, direct it parallel to your canvas and the fine mist will settle down evenly. While I sprayed the gold, I didn’t have this idea but then look at the pink…it looks nice right?
You need to spray only a little of the gold alcohol spray and you can use sponge blenders to spread/blend the colours with the blending solution. See how sparse the spray looks on the canvas but once I spread them using the blending solution, they look pretty and just enough for the bright look.I used the round/cylindrical sponge blenders from Itsy Bitsy. I sprayed the blending solution in small areas and started blending them by just dabbing them with the sponge blender. If you roll the dauber over it, you are sure to get streaks or lines so I dabbed them over and over again till I attained the level of smoothness I wanted. You can even spray the blending solution on the sponge and dab on the canvas. Here is a look of the canvas with a part that is blended.
P.S – I did a few more project with these alcohol splashes and I think a better way to work with it would be spray the color into the blending sponge and apply on the canvas. If you are using two shades, leave a gap between the two shades as blending area and then once the shades are separately done, on the same dauber, apply alcohol blending solution and dab in the gap for smooth blending.
You can see how little of the ink is enough to blend and spread into a colorful background. A close up of the blended and un-blended area on the canvas.The canvas was a little big and honestly my hands were aching with all the patient dabbing But good efforts are always worth the result… right?
Once the base was ready, I kept the practice paper over the canvas and decided the spacing and alignment of my lines. I used black fabric paint to write the quote ( acrylic paint would work to – I didn’t have one!) . You can use a white pencil to make a rough of the quote before going in with the fabric paint. I just went ahead and wrote the quote slowly and steadily, keeping an eye on the alignment and spacing. I use Monte Marte gallery series brush in size 3 or 4 for all my hand-lettering (the brush for acrylic paint works well). Any brush is fine as long as its round and you have practiced the letters a few times on a paper before trying it on your canvas.
Once the fabric paint is dry, it tends to sink into the textures of the canvas and crack so I would advice you to go for another coat of paint at least on the down strokes which are thicker just like I did.
One final touch for this canvas would be a pine wood frame with white border space right? Hope you liked this simple super Handlettered Canvas quote for your wall. Do let me know if you would like to know about my calligraphy stories on blog you can get daily updates on my life, our little crafty moments with grace and loads of updates on Instagram so be sure to join me there See you next time
1. Stickers
Using vinyl letter stickers is arguably the quickest and easiest way to transfer letters onto canvas. Make sure your letter stickers are vinyl and do not say “permanent.” I use vinyl letter stickers like these.
Pros: Simple and easy method to use with spray paint
Cons: Size and fonts are limited
What you need:
How to:
- Paint your canvas the color you would like your letters. Let it dry.
- Place your letter stickers on the canvas. Use your ruler to measure the distance between letters and make sure writing is even and straight.
- Paint your background color over top of the stickers (be careful- if you paint too rough, your letters will move). Be sure not to layer the paint too thick, or it will lift off when you pull off your stickers. Let your canvas mostly dry.
- Peel stickers off while you’re canvas is still slightly tacky. You can use a pair of tweezers if you’re having trouble removing the stickers.
- You may need to clean up the edges of your letters with a small paint brush.
Stencils
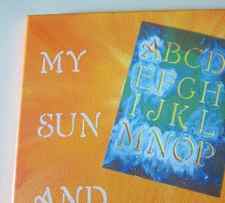
Stencils are a great method if you are planning on painting a more complicated background because you can easily paint the letters over your background.
Pros: Looks clean and sharp. More fonts to work with
Cons: Can be really time consuming!
What you’ll need:
- Plastic, stiff stencils
- 2 small paint brushes
- Ruler
- Water
- Paper towel
How to:
- Paint your canvas in the color background of your choice. Let dry.
- Measure where you want each line of your writing. Place your stencil down and carefully paint over the letter. Make sure your paint is not watery. Lift straight up. Clean the edges of the letter with a clean, slightly wet brush. The brush should lift any excess paint that leaked around the edge of the stencil off the canvas. With the paper towel, wipe excess paint off your stencil. Let the paint dry completely.
- Once the letter dries, you can move on to the next letter.
Carbon paper transfer
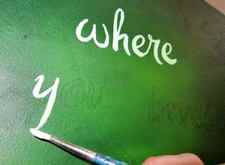
This is my current favorite method of writing on canvases!
Pros: Get neat, clean lines and it’s quicker than stencilling.
Cons: You’ll need a steady hand to use this method. Also, the carbon can smudge on the canvas and get a little messy.
What you’ll need:
- A computer & printer
- Carbon paper
- Ball point pen
- Scissors & tape
- Small paint brush
How to:
- Paint your canvas the background color of your choice. Let dry.
- On your computer, find a font that you like (If can’t find one, google has loads of great fonts you can download for free at http://www.google.com/fonts/).Type out your quote. Determine how large you want each letter or word to be and readjust your font. Printyour quote.
- Arrange your quote on your canvas. You may need to cut the words out and readjust them depending on how big your canvas is.
- Place carbon paper face down underneath each word. Tape the paper and carbon paper in place.
- Trace over the letters with your ball point pen. Don’t press too hard or you’ll dent your canvas. Carefully remove the tape and papers.
- With your small paint brush, paint within the lines in the contrasting color. Let dry. If you’re using a light color on a dark background, you may need 2 coats.
- Erase any pencil marks that are left over.
After you complete your project, I recommend you coat your canvas with the finishing spray to protect it. Again, I use this Krylon Matte Finish Spray; this brand also comes in glossy and satin finishes. And that’s it- you’re all finished! Now you have a beautiful piece of personalized art. You can frame your canvas, or just hang it right on the wall, like I do.
Tell me, which methods have you tried? What are the pros and cons you’ve encountered? Is there an easier way you’ve made the same project? I’d love to hear from you!
UPDATE: Since you all liked this tutorial, I wrote another! See more ideas for writing quotes on canvas with my new post, 3 (More) Ways to Paint Quotes on Canvas
Posted in: DIY, Everything Filed under: DIY projects, painting, quotes
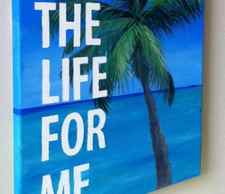
Inspirational Art

Brighten your walls with art that inspires you. Paint vibrant colors on a canvas, then add a simple image and phrase using black paint.
Cheery Sunflowers

Practice your painting skills with a simple floral design like a sunflower. Frame your artwork for your bathroom or bedroom.
Resources Related to DIY Canvas Painting Ideas
With a few canvas ideas in mind, create artwork that will look beautiful on your walls. Hand-painted pieces are often kept as keepsakes and handed down for generations. Design custom home decor to accent your new statement piece canvas painting.

Gifts for Kids

Save the Dates

Canvas Prints

Photo Calendars
Categories
Tags
Written by Shutterfly Community | View all posts
Shutterfly Community is here to help capture and share life’s most important moments. Discover thoughtful gifts, creative ideas and endless inspiration to create meaningful memories with family and friends.
Visit their Website. You can follow on Instagram and Pinterest.
Most Recent Articles
Have A Great Black Friday With Shutterfly Deals
Black Friday 2023: Shutterfly Promo Codes & Discounts
15+ Fun Christmas Card Ideas With Dogs
Relive Memories With Year in Review Photo Books
How To Make Personalized Christmas Ornaments
You May Also Like
- Discover the Perfect Spoonflower Bedding for Your Dream Bedroom
- Make a Custom Poster From Your Photos
- 14 Best Personalized Housewarming Gifts for 2023
- How to Make a Canvas Print With Your Photos
- How to Make Fleece Photo Blankets
We Recommend
- Creating Personalized Canvas Prints Online
- The Best Canvas Prints: 8 Styles For Any Home
- What To Write In A Holiday Card
- Christmas Greetings Wording: What To Write In A Christmas Card
- What Is A Metal Print? Here’s What You Should Know
- Make Your Own Custom Puzzle From A Picture
- Relive Memories With Year In Review Photo Books
- 100+ Clever Christmas Captions For Photos
- 75+ Christmas Quotes To Help You Celebrate The Season
- 75+ Christmas Bible Verses For Cards
- How To Get The Best Shutterfly Photo Book Deals
- Create Your Own Custom Photo Book With Text
- 2023 Holiday Gift Guide
- 20+ Heartfelt Christmas Gift Ideas For Your Boyfriend
- 55 Family Quotes And Family Sayings
- The 50 Best Happy Birthday Quotes To Help You Celebrate


